
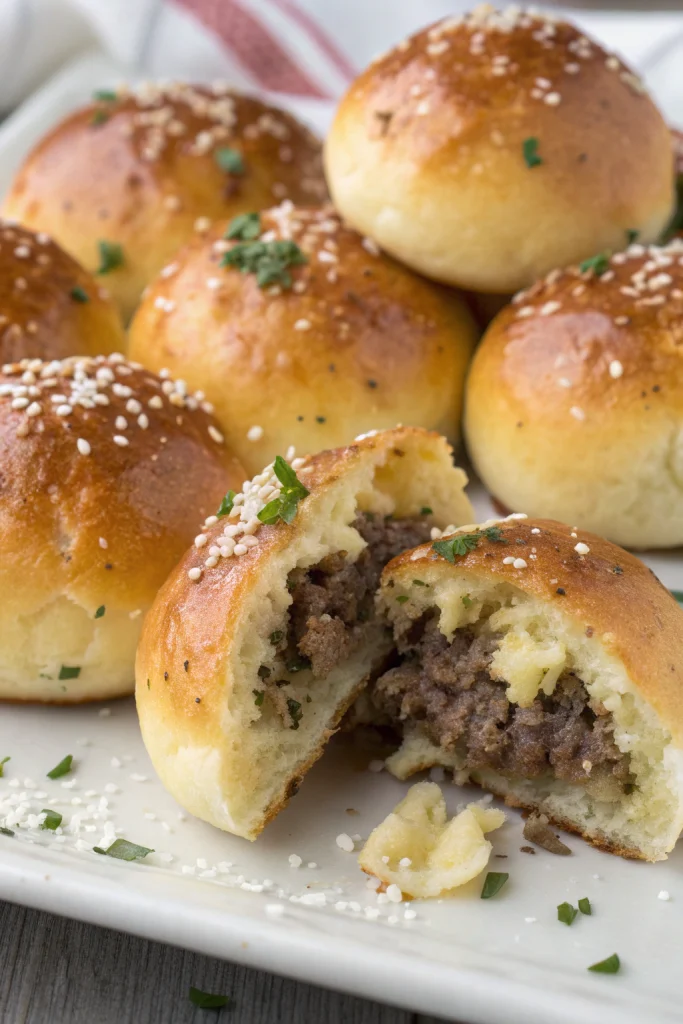
Garlic Parmesan Cheeseburger Bombs Recipe tastes like a juicy cheeseburger wrapped in buttery garlic bread, with melty cheese that stretches in the best way. It works for busy families, game day snacks, or casual parties, and you can finish a batch in about 45 minutes from start to table. I first made these for a Sunday movie night, and my kids now request them more than actual burgers.
Tasty Garlic Parmesan Cheeseburger Bombs Recipe at Home
You get all the flavor of a loaded cheeseburger in a soft, garlicky, pull-apart roll that you can eat with your hands. The garlic butter and parmesan soak into the dough, while the beef, onions, and cheese stay juicy inside. It tastes like a burger shop and a garlic bread basket teamed up in your kitchen.
You control the ingredients, so you can use leaner beef, your favorite cheese, and as much or as little garlic as your social life can handle. Frozen biscuit dough or pizza dough keeps the process simple, so you can focus on the fun part: stuffing and brushing everything with buttery goodness. Kids love to help roll the dough, and adults love to eat the results.
“These garlic parmesan cheeseburger bombs taste like the best parts of burger night and garlic bread night rolled into one bite-sized snack.”
Ingredients You Need
cheeseburger filling
- 1 pound ground beef, 80% to 90% lean
- Higher fat adds more flavor, leaner beef keeps it lighter.
- 1 small yellow onion, finely diced
- 2 cloves garlic, minced
- 1 teaspoon kosher salt
- 1/2 teaspoon black pepper
- 1 teaspoon Worcestershire sauce
- 1 tablespoon ketchup
- 1 teaspoon yellow mustard or Dijon mustard
- 1/2 cup shredded cheddar cheese
- Use sharp cheddar for stronger flavor, or a cheddar jack blend for extra melt.
- 1/4 cup diced pickles, optional
- Use dill pickles for classic burger flavor, or bread and butter pickles for a sweeter bite.
dough
You can use any of these options, based on what you keep in your kitchen.
- 1 can refrigerated biscuit dough (8 large biscuits)
- Pillsbury Grands style biscuits work great and stay fluffy.
- or 1 pound refrigerated pizza dough
- Store brand pizza dough works fine; let it sit at room temp 20 minutes so it stretches easily.
- or 16 small dinner roll dough balls, thawed if frozen
Garlic parmesan topping
- 4 tablespoons unsalted butter, melted
- 3 cloves garlic, minced or pressed
- 1/4 teaspoon Italian seasoning or dried oregano
- 1/4 teaspoon salt
- 1/4 cup grated parmesan cheese
- Use the finely grated shelf-stable kind for better sticking, or fresh grated for stronger flavor.
- 1 tablespoon chopped fresh parsley, optional for garnish
Optional dipping sauces
- Ketchup
- Burger sauce or fry sauce
- Ranch dressing
- Garlic aioli style sauce made from mayo, lemon juice, and garlic
Equipment list
- Large skillet
- Wooden spoon or spatula
- Cutting board and knife
- Mixing bowls
- Pastry brush or clean small brush
- Baking sheet
- Parchment paper or silicone baking mat
- Measuring cups and spoons
Tips & Mistakes
- Brown the beef over medium heat, not high heat, so it cooks through and stays juicy instead of dry.
- Drain extra grease from the skillet, or the filling will leak out and soak the dough.
- Chop onions and pickles very small so they tuck into the dough without poking holes.
- Cool the filling slightly before stuffing, or the dough can stretch too much and tear.
- Do not overfill; use about 1 to 1 1/2 tablespoons of filling per bomb so you can seal the dough tightly.
- Pinch seams very firmly and place the seam side down on the baking sheet to keep cheese from oozing out.
- Brush garlic butter on before baking for flavor and again right out of the oven for shine and extra garlic punch.
- Bake until the tops turn deep golden brown; pale tops usually mean raw dough inside.
- Space the bombs slightly apart on the pan so they bake evenly and do not fuse into one giant roll.
- If you use pizza dough, cut it into equal pieces so they bake at the same rate and look uniform.
How to Make Garlic Parmesan Cheeseburger Bombs
Step 1: Sauté veggies and aromatics
Heat a drizzle of oil in a large skillet over medium heat. Add the diced onion and cook until soft and lightly golden, about 5 to 7 minutes. Stir in the minced garlic and cook 1 minute, until it smells fragrant. Season with salt and pepper.
Step 2: Cook the beef and season it
Add the ground beef to the skillet with the onions and garlic. Break it up with a spoon and cook until no pink remains and the meat browns lightly, about 6 to 8 minutes. Drain any extra fat from the skillet. Stir in Worcestershire sauce, ketchup, and mustard, then taste and adjust salt and pepper.
Step 3: Add cheese and mix the filling
Turn the heat to low. Stir in the shredded cheddar cheese until it melts and coats the beef. Fold in diced pickles if you use them. Turn off the heat and let the filling cool for 10 minutes so it thickens and becomes easier to scoop.
Step 4: Prep the dough
Line a baking sheet with parchment paper or a silicone mat. If you use biscuit dough, separate the biscuits and gently flatten each one into a 4 inch circle with your fingers. If you use pizza dough, cut it into 8 to 12 equal pieces and flatten each piece into a small circle. Keep the edges slightly thinner than the center so they fold and seal more easily.
Step 5: Fill and seal the bombs
Spoon about 1 to 1 1/2 tablespoons of the cooled cheeseburger mixture into the center of each dough circle. Pull the edges of the dough up and over the filling, then pinch them together firmly to seal. Roll each piece gently between your hands to form a smooth ball. Place each ball seam side down on the prepared baking sheet, leaving a little space between each one.
Step 6: Mix the garlic parmesan topping
In a small bowl, stir together the melted butter, minced garlic, Italian seasoning, and salt. Use a pastry brush to coat the tops and sides of each dough ball with the garlic butter mixture. Sprinkle grated parmesan cheese over the tops. Save a little garlic butter for brushing after baking if you like extra flavor.
Step 7: Bake until golden
Heat your oven to 375°F. Bake the cheeseburger bombs for 15 to 20 minutes, until the tops turn deep golden brown and the dough feels firm. If the tops brown too quickly, you can tent the pan loosely with foil for the last few minutes. Brush with any remaining garlic butter as soon as they come out of the oven, then sprinkle with fresh parsley.
Step 8: Cool slightly and serve
Let the bombs cool for about 5 minutes so the cheese sets a bit and the centers do not burn your mouth. Transfer them to a serving plate or board. Serve warm with ketchup, burger sauce, or your favorite dipping sauce. Watch them disappear faster than regular burgers.
Variations I’ve Tried
I like to make a bacon cheeseburger version by adding crisp crumbled bacon to the beef and cheese mixture. A spicy version works great with pepper jack cheese, diced pickled jalapeños, and a pinch of chili powder in the filling. For a barbecue twist, I swap the ketchup for barbecue sauce and use smoked cheddar or gouda.
You can make a mushroom and Swiss version with sautéed mushrooms and Swiss cheese instead of cheddar and pickles. For kids who avoid onions, I grate the onion very fine or use onion powder in the beef mixture. If you want a lighter option, you can use ground turkey with a bit of extra Worcestershire and cheddar to keep the flavor rich.
How to Serve Garlic Parmesan Cheeseburger Bombs
Serve these cheeseburger bombs hot or warm, with a side of crisp salad, carrot sticks, or oven fries for a full meal. I like to set out small bowls of ketchup, burger sauce, ranch, and mustard so everyone can pick their favorite dip. They work well as a party appetizer, game day snack, or fun dinner that kids can eat with their hands. Add a big pitcher of iced tea, lemonade, or flavored water and you have a relaxed, crowd pleasing spread.
Make-Ahead
You can assemble the Tasty Garlic Parmesan Cheeseburger Bombs Recipe earlier in the day and keep the unbaked bombs in the fridge for up to 24 hours. Cover the tray tightly and brush with garlic butter right before baking. For longer storage, freeze the unbaked bombs on a tray until firm, then move them to a freezer bag and keep them for up to 2 months.
If you bake them from frozen, lower the oven temperature to 350°F and add 5 to 10 extra minutes, watching for deep golden tops. Store leftover baked bombs in an airtight container in the fridge for up to 3 days. Reheat them in a 325°F oven or air fryer until hot and crisp on the outside; the microwave works in a pinch, but the texture stays best with dry heat.
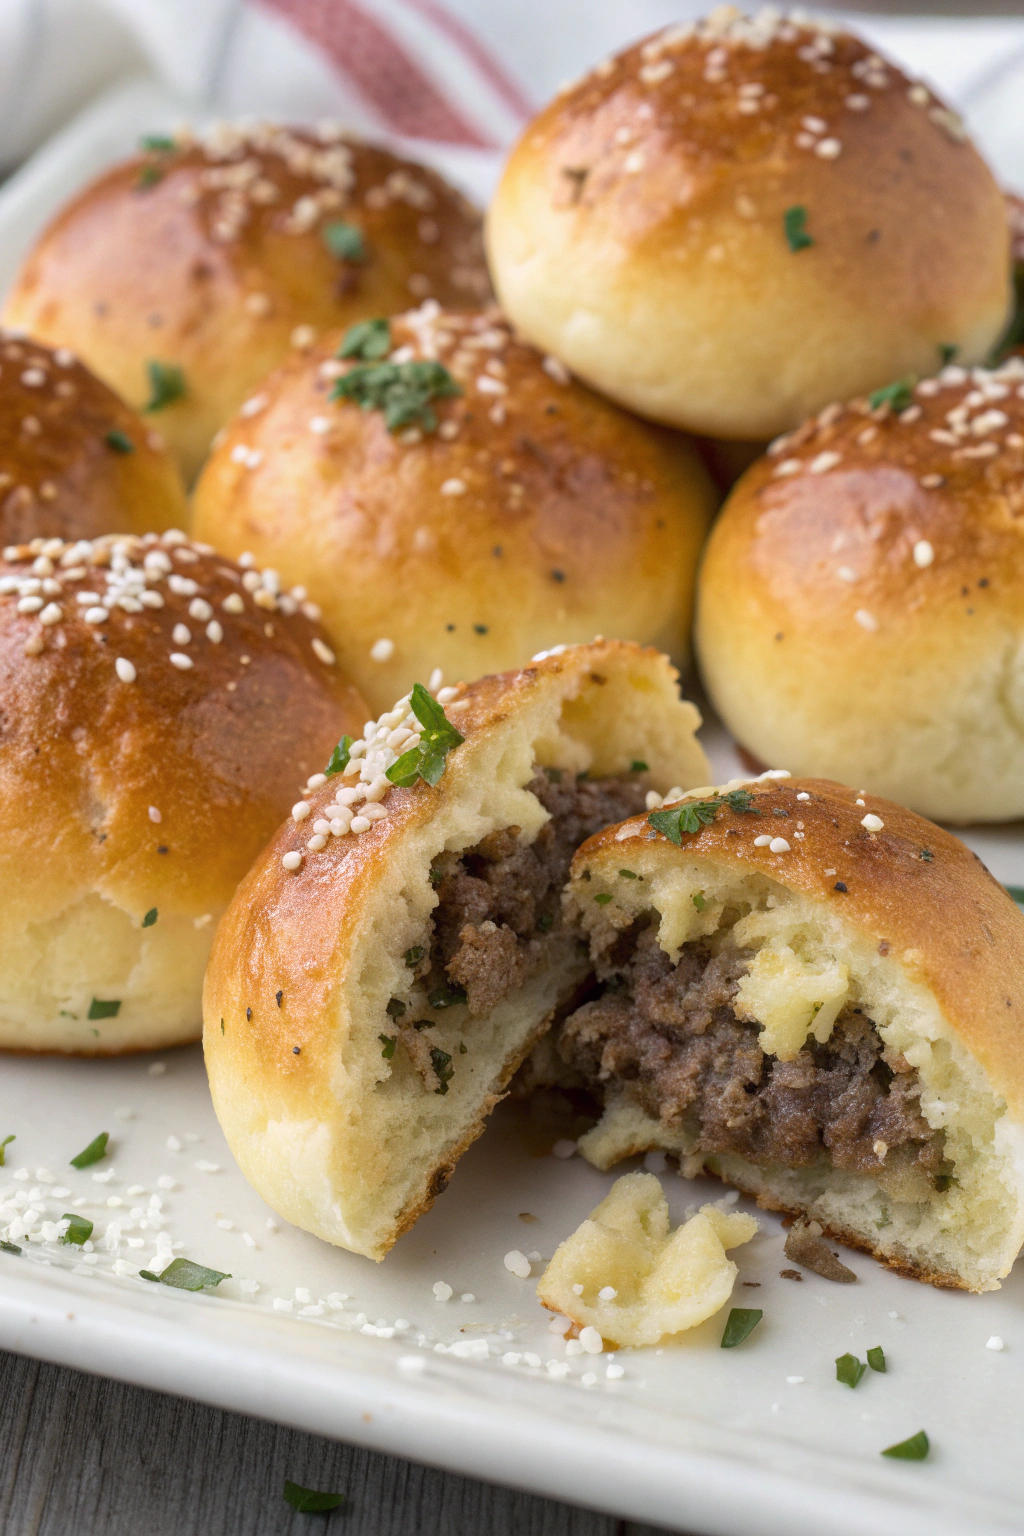
Tasty Garlic Parmesan Cheeseburger Bombs
Ingredients
Instructions
- Preheat the oven to 375°F (190°C). Line a baking sheet with parchment paper or lightly grease it.
- In a skillet over medium heat, cook the ground beef and diced onion, breaking the meat apart, until the beef is browned and cooked through. Drain excess fat if needed.
- Stir in the minced garlic, salt, pepper, ketchup, and mustard. Cook for 1–2 minutes more, then remove from heat and let cool slightly.
- Once the meat mixture has cooled a bit, stir in the shredded cheddar cheese until evenly combined.
- Separate the biscuit dough and gently flatten each biscuit into a round disc. Place a spoonful of the cheeseburger mixture in the center of each disc.
- Carefully bring the edges of the dough up and around the filling, pinching to seal completely so the filling is enclosed in a ball. Place seam-side down on the prepared baking sheet.
- In a small bowl, mix together the melted butter, minced garlic, grated Parmesan, and dried parsley if using. Brush the tops of each dough ball generously with the garlic Parmesan butter.
- Bake for 15–20 minutes, or until the cheeseburger bombs are puffed and golden brown on top.
- Remove from the oven and let rest for a few minutes before serving. Serve warm, optionally with extra ketchup or dipping sauce on the side.
Notes
Approximate per 1 cheeseburger bomb (1 of 12): 230 calories; fat 14 g; saturated fat 7 g; carbohydrates 15 g; fiber 0 g; sugars 3 g; protein 9 g; sodium 540 mg. Values are estimates and will vary based on specific ingredient brands, substitutions, and portion size.
Leave a Reply