

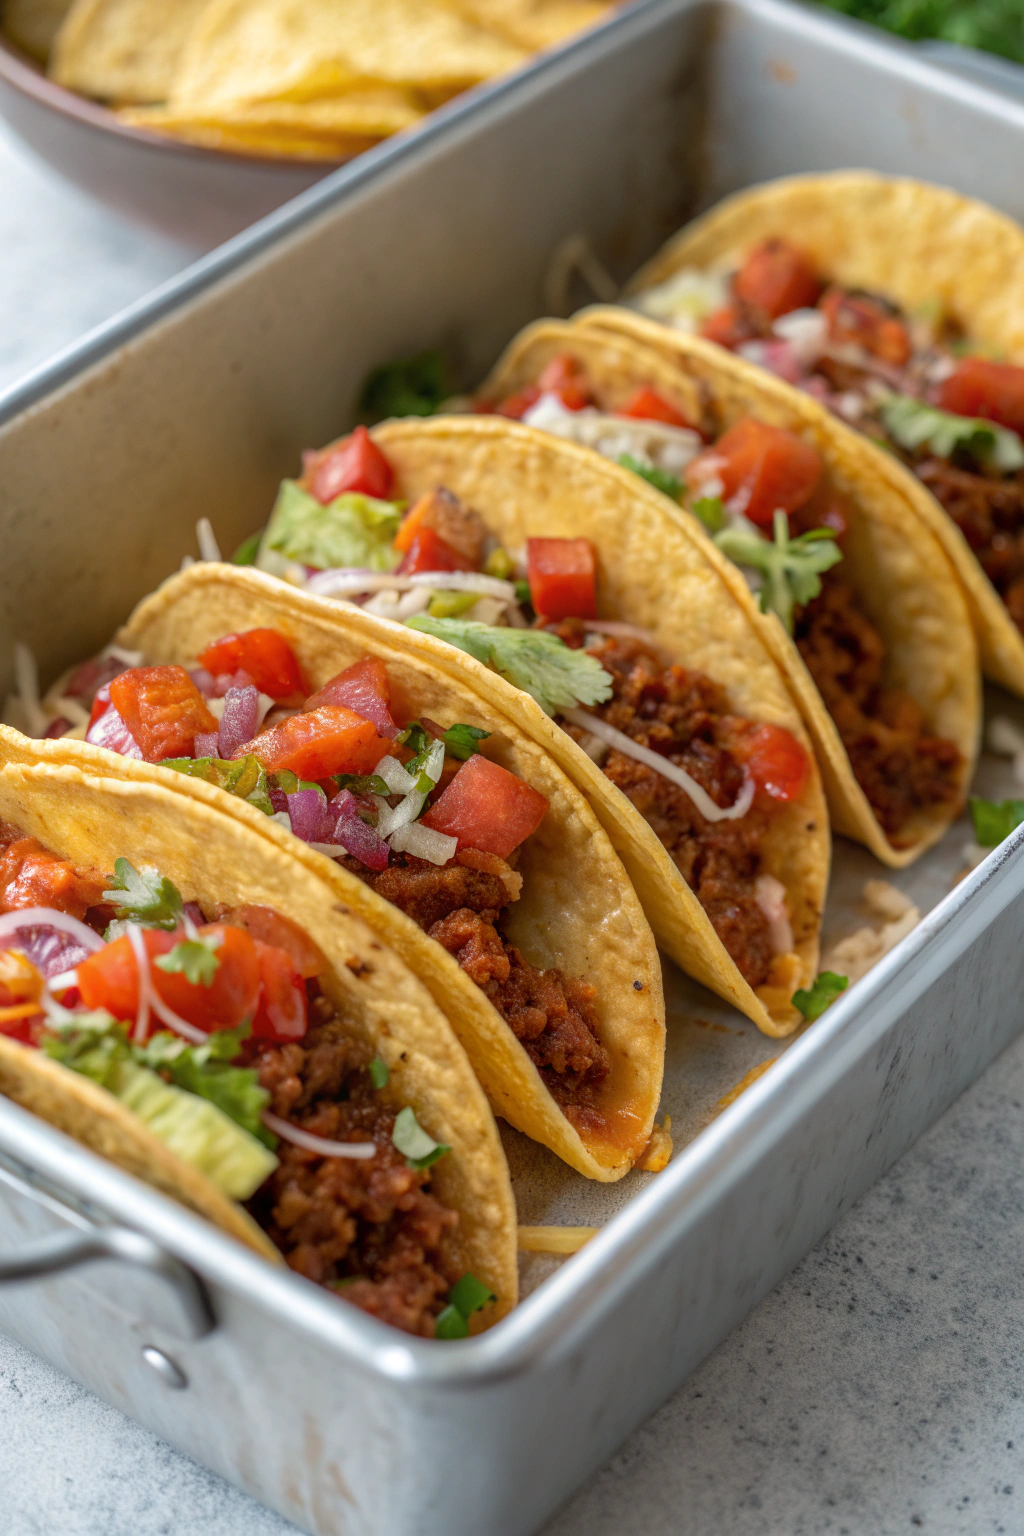
Oven-Baked Cheesy Tacos Recipe hits every comfort-food note: melty cheese, seasoned beef, and crisp-edged tortillas that taste like a mash-up of tacos and a casserole. It works for busy weeknights, game days, or feeding a hungry crew in about 40 minutes start to finish. I tested versions of this for my own chaotic Tuesday nights, so you get the dialed-in, no-fuss version.
Why Oven-Baked Cheesy Tacos Recipe Is Worth It
Oven-baked cheesy tacos give you all the flavor of classic tacos with way less stovetop juggling. You line up the shells in a pan, load them once, and the oven finishes the job while you clean the cutting board. That setup works perfectly for families, parties, or anyone who prefers easy assembly over last-minute chaos.
The cheese melts into the meat and sticks everything together, so the filling stays put when you bite in. The shells crisp in the oven, so you get that satisfying crunch without deep frying. You also keep everything warm in one pan, which helps when people drift into the kitchen at different times.
“These oven-baked cheesy tacos taste like my favorite taco truck met a casserole dish. The shells stay crispy, the cheese pulls like a pizza, and my kids ask for them every single week. Cleanup stays simple, and leftovers reheat like a dream.”
Ingredients You Need
Here is what you need for this Oven-Baked Cheesy Tacos Recipe:
- 12 crunchy taco shells
- Stand-and-stuff shells work best, since they hold filling upright.
- 1 pound ground beef (80/20 or 85/15 for juicy flavor)
- Swap with ground turkey or chicken for a lighter version.
- 1 tablespoon olive oil or neutral oil
- 1 small yellow onion, finely diced
- 2 cloves garlic, minced
- 1 jalapeño, seeded and minced (optional for heat)
- 2 tablespoons taco seasoning
- Use your favorite packet or homemade blend with chili powder, cumin, smoked paprika, oregano, and salt.
- 1 tablespoon tomato paste
- 1 cup canned tomato sauce or crushed tomatoes
- 1 teaspoon kosher salt, plus more to taste
- 1/2 teaspoon black pepper
- 1/2 teaspoon smoked paprika (optional, for a subtle smoky note)
- 1 can (15 ounces) black beans or pinto beans, drained and rinsed
- 1 cup frozen corn, thawed
- 2 to 2 1/2 cups shredded cheese
- Use a blend of cheddar, Monterey Jack, or a Mexican blend; pre-shredded works fine for this recipe.
- 1/4 cup chopped fresh cilantro (optional, for garnish)
- 1 lime, cut into wedges, for serving
Topping ideas:
- Shredded lettuce
- Diced tomatoes
- Sliced green onions
- Sour cream or Greek yogurt
- Guacamole or sliced avocado
- Salsa or pico de gallo
Pantry shortcuts and notes:
- Taco seasoning packets save time and keep flavor consistent.
- Canned beans and frozen corn bulk up the filling without extra cooking.
- Pre-shredded cheese melts nicely and saves a few minutes of grating.
Equipment list:
- Large skillet
- Baking dish (9×13 inches works well)
- Cutting board and knife
- Wooden spoon or spatula
- Measuring spoons and cups
- Aluminum foil (optional, for easier cleanup)
Quick Tips & substitutions
This section keeps your Oven-Baked Cheesy Tacos Recipe flexible, budget-friendly, and stress-free.
- Use stand-and-stuff taco shells so they stay upright and hold more filling.
- Warm the shells in the oven for 3 to 4 minutes before filling to help them crisp and resist sogginess.
- Swap ground beef with ground turkey, chicken, or plant-based crumbles for a different protein.
- Stir in a splash of beef or chicken broth if the filling looks dry before baking.
- Use any melty cheese you have: cheddar, Colby Jack, pepper Jack, or a bagged Mexican blend.
- Skip jalapeño for mild tacos, or keep the seeds if you want more heat.
- Replace black beans with pinto beans or refried beans if that is what your pantry holds.
- Use Greek yogurt instead of sour cream for a lighter topping that still tastes creamy.
- Line the baking dish with foil for quicker cleanup after cheese melts and crisps.
- Pack the filling firmly into the shells so they stay full and hold together after baking.
How to Make Oven-Baked Cheesy Tacos
Step 1: Sauté veggies and aromatics
Heat oil in a large skillet over medium heat. Add diced onion and jalapeño and cook until they soften and turn translucent, about 5 to 7 minutes. Stir in garlic and cook 1 minute, until it smells fragrant and toasty. Season with a pinch of salt and pepper.
Step 2: Brown the meat
Add ground beef to the skillet with the veggies. Break it up with a wooden spoon and cook until the meat browns and no pink remains, about 6 to 8 minutes. Stir frequently so the meat browns evenly and does not clump. Drain excess fat if the skillet looks very greasy, then return the skillet to the heat.
Step 3: Season the filling
Sprinkle taco seasoning and smoked paprika over the meat mixture and stir to coat everything. Add tomato paste and cook 1 minute to toast it and deepen the flavor. Pour in tomato sauce and stir until the mixture looks saucy but still thick. Taste and adjust salt and pepper so the filling tastes bold and well seasoned.
Step 4: Add beans and corn
Stir in black beans and corn until they spread evenly through the meat. Let the mixture simmer on low for 3 to 5 minutes so the flavors blend and the beans warm through. If the filling looks too thick, add a splash of water or broth. Turn off the heat and let the filling sit while you prep the shells.
Step 5: Prep the taco shells
Preheat the oven to 375°F (190°C). Stand the taco shells upright in a 9×13 inch baking dish so they sit snugly together. If the shells tip, tuck a small piece of foil between them for support. Warm the empty shells in the oven for 3 to 4 minutes, then pull the pan out.
Step 6: Fill and top with cheese
Spoon the meat and bean mixture into each shell, packing it down gently with the spoon. Fill each shell almost to the top so every bite tastes hearty. Sprinkle a generous layer of shredded cheese over each taco, covering the filling from edge to edge. Use all the cheese so you get that cheesy crust on top.
Step 7: Bake until cheesy and crisp
Place the baking dish in the oven and bake for 10 to 12 minutes, until the cheese melts and bubbles and the shell edges look golden. If you like extra crispy cheese, leave the pan in for another 2 minutes and keep an eye on it. Pull the tacos from the oven and let them sit 3 to 5 minutes so the cheese sets slightly. Sprinkle with chopped cilantro if you like.
Step 8: Add fresh toppings and serve
Top the baked cheesy tacos with shredded lettuce, diced tomatoes, green onions, and dollops of sour cream or Greek yogurt. Add avocado or guacamole and a spoonful of salsa or pico de gallo. Squeeze lime wedges over the top for brightness. Serve the pan right at the table so everyone can grab their favorites.
Recipe Variations
You can tweak this Oven-Baked Cheesy Tacos Recipe to fit almost any diet or craving.
- Gluten-free: Use certified gluten-free taco shells and check your taco seasoning label for hidden gluten.
- Dairy-free: Use dairy-free shredded cheese and dairy-free yogurt instead of sour cream.
- Vegan: Swap ground beef with crumbled tofu, lentils, or plant-based crumbles, and use vegan cheese and toppings.
- Low carb: Use low-carb tortillas and bake them in a greased muffin tin, or use mini bell peppers as the “shells.”
- Extra protein: Add more beans or stir in cooked quinoa to bulk up the filling.
- Spicy version: Add chipotle in adobo, extra jalapeño, or hot sauce to the meat mixture.
- Kid-friendly: Skip jalapeño, use mild cheese, and serve toppings on the side so kids build their own.
- Veggie-loaded: Add diced bell peppers, zucchini, or mushrooms to the skillet with the onions.
Ways to Serve Oven-Baked Cheesy Tacos
These oven-baked cheesy tacos play nicely with a lot of easy sides.
- Serve with Mexican rice, cilantro-lime rice, or simple buttered rice.
- Add a side of refried beans or charro-style beans for extra protein.
- Pair with a big green salad or chopped salad for crunch and freshness.
- Offer chips with salsa, pico de gallo, or guacamole for scooping up extra filling.
- Set up a toppings bar with lettuce, tomatoes, onions, jalapeños, and sauces so everyone customizes their own plate.
- Pack leftovers into lunch containers with a side of fruit for a balanced meal.
Storage Success
Store leftover oven-baked cheesy tacos in an airtight container in the fridge for up to 3 days. For best texture, reheat them in the oven or toaster oven at 350°F until the cheese melts and the shells crisp again. You can also reheat in the air fryer for a few minutes for extra crunch. If you plan for leftovers, keep some shells and filling separate, then bake fresh tacos the next day for that just-made texture.
Oven-Baked Cheesy Tacos Recipe
Ingredients
Instructions
- Preheat the oven to 375°F (190°C). Stand the taco shells upright in a baking dish so they are ready to be filled.
- Heat the olive oil in a skillet over medium heat. Add the onion and cook until softened, about 3–4 minutes. Stir in the garlic and cook for 30 seconds.
- Add the ground beef to the skillet and cook, breaking it apart with a spoon, until browned and cooked through. Drain any excess fat.
- Stir in the taco seasoning, tomato sauce, and water. Simmer for 3–5 minutes, stirring occasionally, until the mixture thickens slightly.
- Spoon the seasoned beef mixture evenly into the taco shells in the baking dish.
- Sprinkle the shredded cheddar cheese evenly over the top of the filled tacos.
- Bake in the preheated oven for 10–12 minutes, or until the cheese is melted and the taco shells are lightly crisped.
- Remove from the oven and top each taco with shredded lettuce, diced tomato, and any optional toppings like sour cream and green onions.
- Serve immediately while hot and cheesy.
Notes
Approximate per 2-taco serving: 520 calories; fat 32 g; saturated fat 14 g; carbohydrates 32 g; fiber 4 g; sugars 4 g; protein 25 g; sodium 800 mg. Values will vary based on brands, add-ins, and portion size.
Leave a Reply