
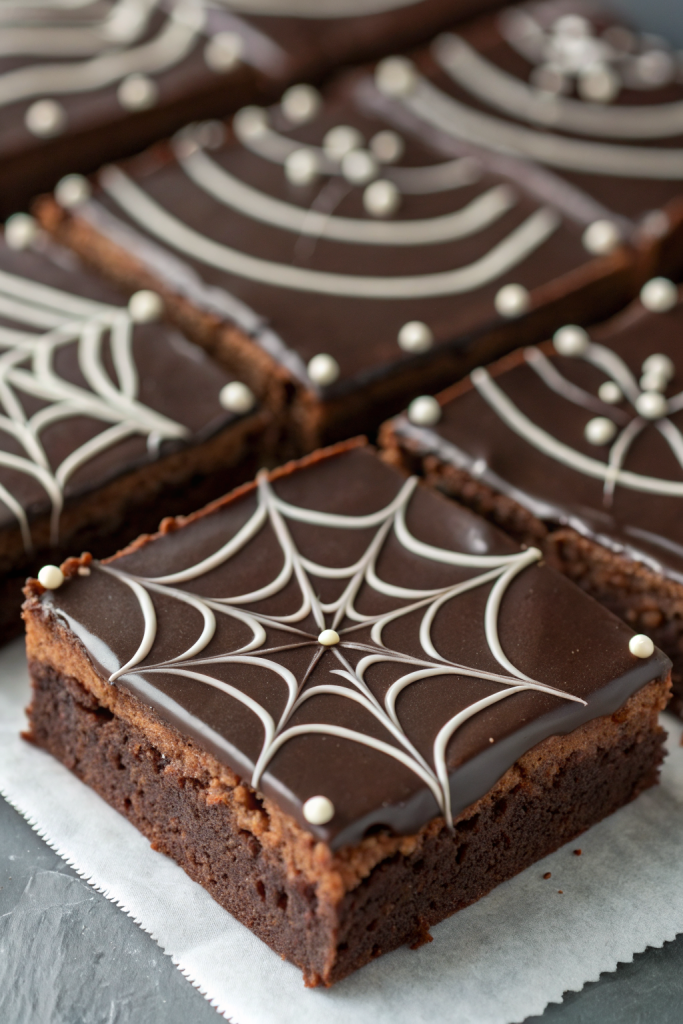
White Chocolate Spiderweb Brownies Recipe layers a super fudgy dark chocolate base with a sweet, creamy white chocolate web that looks spooky but tastes like a bakery treat. It works perfectly for Halloween parties, bake sales, or a fun weekend project, and you can finish the whole thing in about 1 hour including cooling. I tested this with my kids and my neighbors, and not a single brownie survived the night.
Why Make This White Chocolate Spiderweb Brownies Recipe at Home
You control the chocolate level, the sweetness, and the texture, so the brownies actually taste like chocolate instead of sugar. You also skip weird preservatives and use real butter and cocoa, which gives a richer flavor and a shiny, crackly top.
You also get a dessert that looks impressive on a party table but uses simple pantry ingredients. Kids love the spiderweb design, adults love the deep chocolate flavor, and you get all the credit without any fancy pastry skills.
"These White Chocolate Spiderweb Brownies disappeared from our Halloween table in minutes and everyone begged for the recipe. ★★★★★"
Ingredients You Need
Brownie base
- 1 cup (2 sticks) unsalted butter, cut into pieces
- I like Kerrygold or any butter with at least 80 percent butterfat.
- 8 ounces semi sweet or dark chocolate, chopped
- Use baking bars like Ghirardelli or Baker’s; chocolate chips work in a pinch but do not melt as smoothly.
- 1 1/2 cups granulated sugar
- 1/2 cup light brown sugar, packed
- 4 large eggs, room temperature
- 2 teaspoons pure vanilla extract
- 1 cup all purpose flour, spooned and leveled
- 1/3 cup unsweetened cocoa powder
- Dutch process cocoa gives a deeper color and flavor, but natural cocoa also works.
- 1/2 teaspoon fine sea salt
- Optional: 1/2 cup mini chocolate chips or chopped chocolate for extra fudgy pockets
White chocolate spiderweb topping
- 6 ounces white chocolate, finely chopped
- Use real white chocolate with cocoa butter, not candy melts, for the best flavor.
- 2 tablespoons heavy cream or whole milk
- 1 tablespoon butter
- 1/4 cup powdered sugar, sifted, if you want a thicker, pipeable consistency
Optional decorations
- A few chocolate chips or mini chocolate candies to form tiny “spiders”
- Black gel icing or melted dark chocolate to draw small spiders on the web
Equipment
- 8 inch or 9 inch square metal baking pan
- Metal pan bakes more evenly than glass and gives better edges.
- Parchment paper
- Medium and large heatproof bowls
- Small microwave safe bowl for white chocolate
- Whisk and rubber spatula
- Toothpick or wooden skewer for drawing the web
- Piping bag or small zip top bag with a tiny corner snipped off
Tips & Mistakes
- Line the pan with parchment and leave an overhang so you lift the brownies out cleanly.
- Melt the butter and chocolate gently so you do not scorch the chocolate; low and slow heat works best.
- Let the melted chocolate mixture cool a bit before you add the eggs so you do not scramble them.
- Whisk the eggs and sugars until glossy to build a shiny top and chewy texture.
- Fold the flour and cocoa in gently and stop when no dry streaks remain; overmixing turns the brownies cakey.
- Bake until the edges set and the center still looks slightly soft; a toothpick should come out with moist crumbs, not wet batter.
- Cool the brownies until just warm before you add the white chocolate topping so it sets nicely instead of sliding off.
- Use a toothpick to drag the white chocolate lines from center to edges to form a clean spiderweb pattern.
- Cut with a sharp knife that you wipe between slices to keep the web design neat.
- Chill the brownies before transport so the web stays firm and clean.
How to Make White Chocolate Spiderweb Brownies Recipe
Step 1: Prep the pan and oven
Preheat your oven to 350°F. Line your square pan with parchment and leave a little overhang on two sides so you lift the brownies out later. Lightly grease the parchment with butter or nonstick spray.
Step 2: Melt chocolate and butter
Place the chopped semi sweet or dark chocolate and butter in a large heatproof bowl. Set the bowl over a pot with a little simmering water and stir until smooth, or microwave in 20 to 30 second bursts and stir between each round. Remove from heat and let the mixture cool for about 5 minutes so it feels warm, not hot.
Step 3: Add sugars and eggs
Whisk the granulated sugar and brown sugar into the warm chocolate mixture until it looks thick and glossy. Add the eggs one at a time and whisk well after each addition. Stir in the vanilla extract until the batter looks smooth and shiny.
Step 4: Add dry ingredients
In a separate bowl, whisk together the flour, cocoa powder, and salt. Sift if your cocoa looks lumpy. Add the dry mixture to the chocolate bowl and fold gently with a spatula until no dry streaks remain, then fold in the mini chocolate chips if you use them.
Step 5: Bake the brownies
Pour the batter into the prepared pan and spread it into an even layer. Tap the pan on the counter a couple of times to pop any big air bubbles. Bake 25 to 35 minutes, depending on your pan size and oven, until the edges look set and a toothpick in the center comes out with moist crumbs.
Step 6: Cool to warm
Place the pan on a wire rack and let the brownies cool until just warm. This usually takes 20 to 30 minutes. You want the top set enough to hold the white chocolate but still slightly warm so the topping adheres nicely.
Step 7: Make the white chocolate topping
Place the chopped white chocolate, cream or milk, and butter in a small microwave safe bowl. Heat in 15 second bursts, stirring each time, until the mixture turns smooth and glossy. If you want a thicker consistency for piping, whisk in the powdered sugar until smooth.
Step 8: Spread and pipe the web
Lift the brownies out of the pan using the parchment and set them on a flat surface. Spread a thin, even layer of the white chocolate mixture over the top, or leave some in the bowl for piping if you want a more defined web. If you spread a full layer, let it sit 2 to 3 minutes so it thickens slightly.
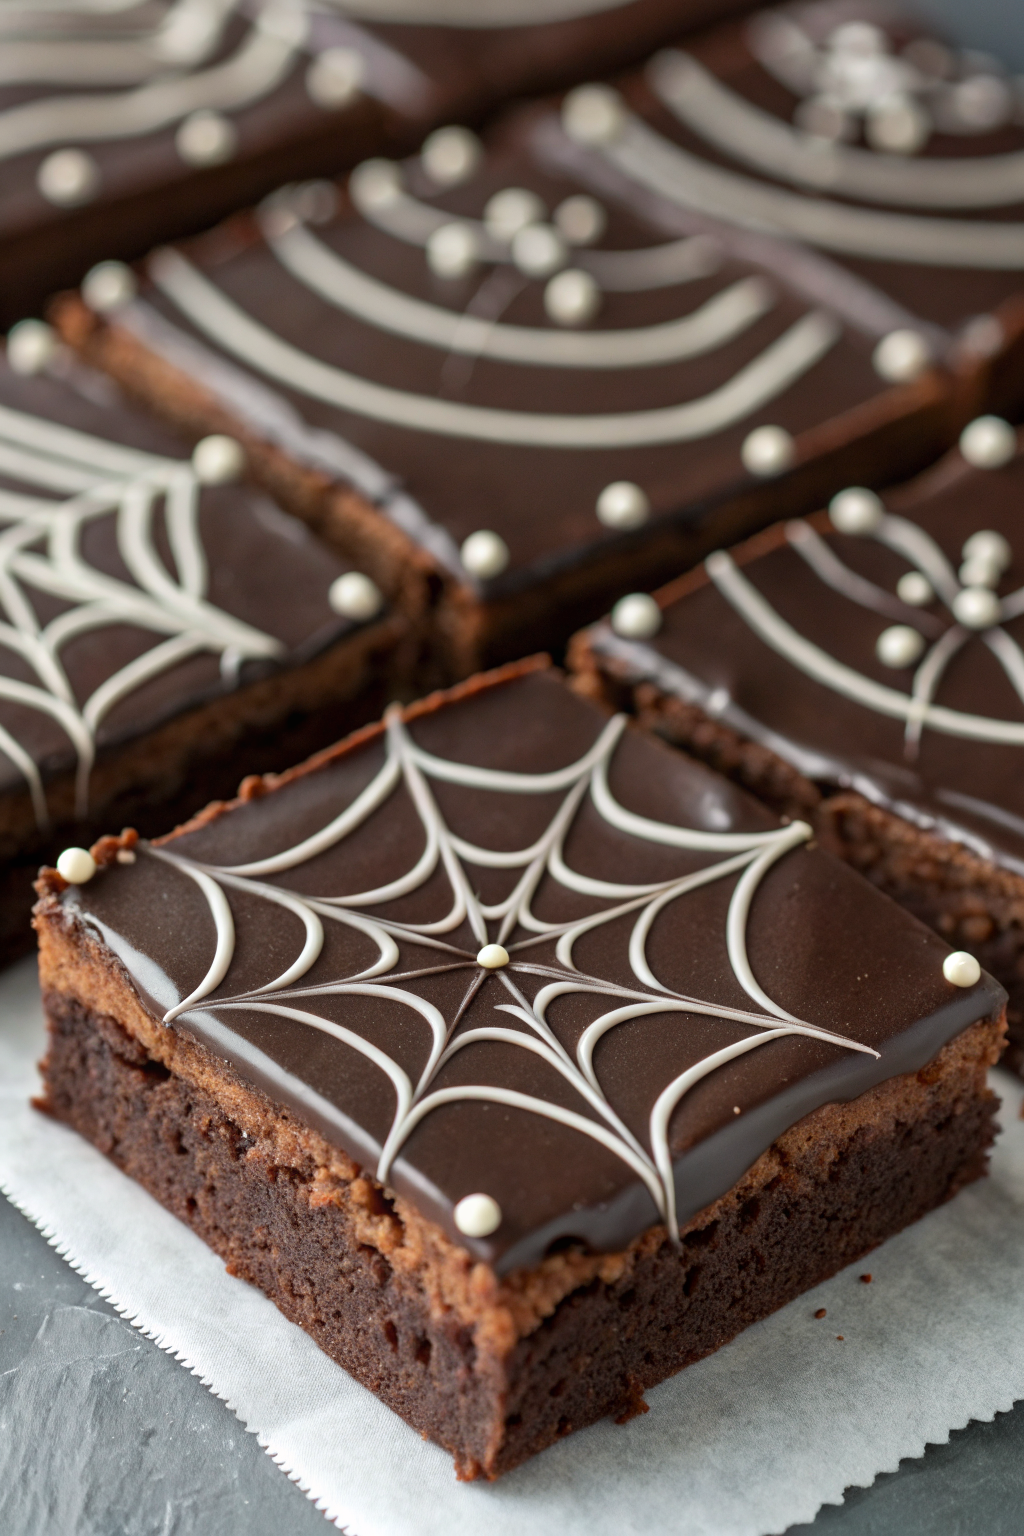
Spoon some of the white chocolate into a piping bag or small zip top bag and snip a tiny corner. Pipe a small circle in the center of the brownies, then pipe two or three larger circles around it like a target. Use a toothpick to drag lines from the center circle out to the corners and edges to form the spiderweb pattern.
Step 9: Add spiders and chill
Use a few chocolate chips or candies to form tiny spiders on the web, or pipe small spider shapes with dark chocolate or black gel icing. Chill the brownies in the fridge for at least 30 minutes so the topping sets. Slice into squares or rectangles with a sharp knife and serve.
Variations I've Tried
I swapped half the semi sweet chocolate with milk chocolate for a sweeter brownie that kids loved, though it tasted a bit less intense. I also added 1 teaspoon espresso powder to the batter, which deepened the chocolate flavor without making it taste like coffee. Peanut butter swirl worked nicely too; I dropped spoonfuls of warmed peanut butter on top of the brownie batter, swirled it lightly, then baked and added the spiderweb on top.
You can also flavor the white chocolate with a tiny drop of peppermint extract for a winter party version. Orange zest in the brownie batter pairs nicely with the Halloween vibe and gives a subtle citrus note. If you need a gluten free option, a good 1 to 1 gluten free baking flour substitute works well, though the texture turns slightly more delicate.
How to Serve White Chocolate Spiderweb Brownies Recipe
Serve these brownies at room temperature so the texture tastes fudgy and the white chocolate tastes creamy. I like to cut them into small squares for party trays and into larger rectangles when I pack them in lunch boxes. Pair them with cold milk, hot chocolate, or a simple mug of coffee or tea. Add a scoop of vanilla or chocolate ice cream on top if you want a full dessert plate that feels bakery level.
How to store
- Store leftover brownies in an airtight container at room temperature for up to 3 days; keep them in a single layer or separate layers with parchment so the web stays neat.
- Keep them in the fridge for up to 5 days if your kitchen runs warm; let them sit at room temperature for 15 minutes before serving so the texture softens.
- Freeze individual squares on a baking sheet until firm, then wrap each piece tightly and store in a freezer bag for up to 2 months.
- Thaw frozen brownies in the fridge overnight or at room temperature for about 1 hour, and warm slightly in the microwave in 10 second bursts if you like them a bit gooey.
White Chocolate Spiderweb Brownies Recipe
Ingredients
Instructions
- Preheat the oven to 350°F. Line an 8- or 9-inch square metal baking pan with parchment paper, leaving an overhang on two sides to lift the brownies out. Lightly grease the parchment.
- Place the chopped semi sweet or dark chocolate and butter in a large heatproof bowl. Melt gently over a pot of simmering water or in the microwave in 20–30 second bursts, stirring between each, until smooth. Let cool for about 5 minutes until warm but not hot.
- Whisk the granulated sugar and brown sugar into the warm chocolate mixture until thick and glossy. Add the eggs one at a time, whisking well after each addition, then stir in the vanilla until the batter looks smooth and shiny.
- In a separate bowl, whisk together the flour, cocoa powder, and salt. Add the dry mixture to the chocolate bowl and fold gently with a spatula just until no dry streaks remain. Fold in mini chocolate chips or chopped chocolate if using.
- Pour the batter into the prepared pan and spread into an even layer. Tap the pan on the counter a few times to release any large air bubbles. Bake for 25–35 minutes, until the edges are set and a toothpick inserted in the center comes out with moist crumbs but not wet batter.
- Place the pan on a wire rack and let the brownies cool until just warm, about 20–30 minutes. The top should be set enough to hold the white chocolate topping.
- For the topping, place the chopped white chocolate, cream or milk, and butter in a small microwave-safe bowl. Heat in 15-second bursts, stirring each time, until smooth and glossy. For a thicker, pipeable consistency, whisk in the powdered sugar until smooth.
- Lift the warm brownies out of the pan using the parchment and place on a flat surface. Spread a thin, even layer of the white chocolate mixture over the top, reserving some for piping if desired. Let it sit 2–3 minutes to thicken slightly.
- Spoon some of the white chocolate into a piping bag or small zip-top bag and snip a tiny corner. Pipe a small circle in the center of the brownies, then two or three larger circles around it like a target. Use a toothpick or skewer to drag lines from the center out to the edges to create a spiderweb pattern.
- Add chocolate chips, candies, or piped dark chocolate or black gel icing to form tiny spiders on the web, if desired. Chill the brownies for at least 30 minutes until the topping is set, then slice with a sharp knife, wiping the blade between cuts for neat slices.
Notes
Approximate per 1 brownie (1 of 16): 320 calories; fat 19 g; saturated fat 11 g; carbohydrates 37 g; fiber 2 g; sugars 30 g; protein 4 g; sodium 120 mg. Values are estimates and will vary based on exact ingredients, brands, and portion size.
Leave a Reply