
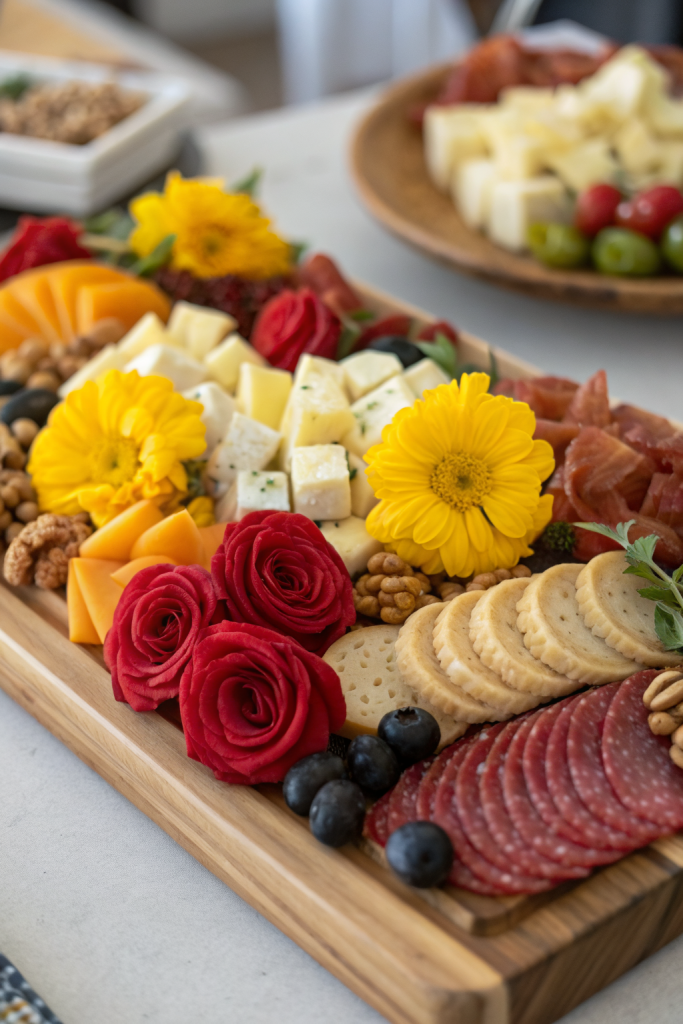
Thanksgiving Charcuterie Board Idea brings together salty, sweet, creamy, and crunchy bites that taste like the best parts of the holiday snacking table in one place. It works for hosts who want a low-cook, high-impact appetizer that comes together in about 30 to 40 minutes, start to finish. I test boards like this every November with my very opinionated family, so you get the version that survives real-life chaos.
Why Thanksgiving Charcuterie Board Idea Is Worth It
A Thanksgiving charcuterie board turns that awkward pre-dinner hunger into something fun and intentional instead of everyone hovering over the kitchen. You give guests a mix of textures and flavors that feel festive without tying you to the stove.
You also control portions and variety much more easily than with a huge hot appetizer spread. You can scale this board for four people or twenty, and you only adjust quantities, not the whole plan.
“This Thanksgiving Charcuterie Board Idea tasted like a holiday grazing table in one place and kept everyone happy until dinner ★★★★★”
Ingredients You Need
Use this as a template and adjust amounts based on how many people you feed. Aim for 3 to 4 bites per person of each main category.
Cheeses
- Aged cheddar, cubed or sliced
- Soft brie or camembert wheel
- Goat cheese log (plain or cranberry coated)
- Smoked gouda or smoked cheddar
- Blue cheese wedge, optional for bold flavor fans
Notes:
Choose at least one mild cheese for kids and cautious eaters. Pre-sliced or pre-cubed cheese saves time and still tastes great. Store-brand blocks usually work fine, but I like Cabot or Tillamook for cheddar.
Meats
- Thinly sliced salami (Genoa or soppressata)
- Prosciutto or country ham slices
- Smoked turkey slices or turkey sausage rounds
- Pepperoni or chorizo rounds for a little spice
Notes:
Use pre-sliced deli packs to save prep time. Fold slices into loose ribbons or rosettes so the board looks full and inviting. Choose at least one mild meat and one with a little heat.
Crackers, Bread, and Crunch
- Assorted crackers: butter crackers, multigrain, seeded
- Thin baguette slices or small dinner rolls
- Breadsticks or pretzel sticks
- Pita chips or flatbread crisps
Notes:
Use at least two cracker styles: one plain, one seeded or flavored. Gluten-free crackers work well and nobody usually notices the swap. Keep some crackers in a basket on the side so they stay crisp.
Seasonal Fruit
- Red and green grapes, left on small stems
- Apple slices (Honeycrisp, Gala, or Fuji)
- Pear slices
- Fresh figs, halved, if you find them
- Pomegranate arils in a small bowl
- Dried apricots, dried cranberries, or golden raisins
Notes:
Toss apple and pear slices in a little lemon juice and water to slow browning. Use dried fruit if fresh options look sad at the store. Frozen pomegranate arils thaw quickly and still look pretty.
Veggies
- Baby carrots
- Cucumber rounds
- Celery sticks
- Cherry or grape tomatoes
- Mini bell peppers, halved and seeded
Notes:
Keep veggies simple and colorful. Pre-cut veggie trays from the store save time; just re-plate them. Dry veggies with a paper towel so they do not water down the board.
Spreads, Dips, and Extras
- Whole grain mustard
- Honey or hot honey
- Fig jam or cranberry jam
- Hummus (classic or roasted red pepper)
- Ranch or yogurt dip
- Mixed nuts: almonds, pecans, walnuts
- Candied pecans or spiced nuts
- Olives (green and black)
- Cornichons or small dill pickles
Notes:
Use small bowls or ramekins for anything sticky, runny, or briny. Store-bought hummus, jam, and dips keep prep simple and still taste great. If you use olives or pickles, pat them dry so they do not leak.
Fun Thanksgiving Touches
- Turkey-shaped crackers or leaf-shaped crackers if you find them
- Candy corn or seasonal chocolate candies in a tiny bowl
- Mini pumpkin-shaped cheeses or cheese balls
- Fresh rosemary or thyme sprigs for garnish
- Roasted pumpkin seeds or pepitas
These touches make the Thanksgiving charcuterie board idea feel seasonal without much extra work.
Equipment List
- Large wooden board, slate, or baking sheet
- 4 to 8 small bowls or ramekins
- Small cheese knives and butter knives
- Small tongs or toothpicks
- Cutting board and sharp knife
- Small spoons for jams, honey, and dips
- Optional: parchment paper to line the board for easier cleanup
Quick Tips & substitutions
- Build the board where you plan to serve it so you do not juggle a heavy tray.
- Slice hard cheeses and meats in advance and chill them, then assemble right before guests arrive.
- Use parchment on top of a baking sheet if you do not own a fancy board.
- Keep strong flavors like blue cheese, olives, and pickles near each other so they do not overpower mild items.
- Swap any meat with extra cheese, nuts, and hummus for vegetarian guests.
- Use gluten-free crackers and veggie sticks to keep the board friendly for gluten-free eaters.
- Offer at least one nut-free corner with separate crackers and cheese for anyone with allergies.
- Keep a small backup stash of crackers, fruit, and nuts in the kitchen to refill empty spots.
- Use lemon water to toss apple and pear slices so they stay bright.
- Add labels or small flags if guests feel shy about strong cheeses or spicy meats.
How to Make Thanksgiving Charcuterie Board Idea
Step 1: Plan the layout
Decide where you want the board to sit and how many people you plan to feed. Choose a board or tray that gives you enough space without looking sparse. Picture the board in zones: cheese, meats, crunchy items, fruit, veggies, and dips.
Place your empty bowls and ramekins on the board first. Spread them out so they create anchors in different corners and the center. These bowls will hold jams, honey, dips, olives, and nuts.
Step 2: Prep cheeses and meats
Slice hard cheeses into thin rectangles, triangles, or cubes. Cut soft cheeses into wedges or leave the wheel whole and score the top lightly so guests feel comfortable cutting into it. Crumble a little blue cheese so it looks inviting.
Fold salami and pepperoni into halves or quarters and stack them into loose piles. Ruffle prosciutto or turkey slices into ribbons so they look full and textured. Keep everything bite-sized so guests do not need to wrestle with big pieces.
Step 3: Add cheeses to the board
Place cheese in three or four different spots on the board. Mix shapes and colors so the board looks balanced. Keep mild cheeses toward the front and stronger cheeses a little off to the side.
Add a small cheese knife to each cheese or at least one knife per two cheeses. Angle a few slices outward so guests see what they can grab easily. This step sets the tone for the whole Thanksgiving charcuterie board idea.
Step 4: Tuck in the meats
Arrange meat next to the cheeses that pair well with them. Place salami near cheddar or gouda, prosciutto near brie, and turkey near milder cheeses. Fan slices or stack folded pieces in small clusters.
Leave a little space between different meats so flavors stay distinct. Add toothpicks or small tongs nearby if you want to keep things extra tidy. Aim for variety in shapes so the board looks interesting.
Step 5: Add crackers and bread
Fill in some of the larger gaps with crackers, bread slices, and breadsticks. Place plain crackers near stronger cheeses and flavored crackers near milder cheeses. Stand breadsticks in a glass or cup if you want some height.
Keep extra crackers in a bowl off to the side so you can refill without tearing apart the design. Make sure at least one cracker option sits near each cheese cluster. This keeps guests from reaching across the whole board.
Step 6: Pile on fruit and veggies
Add grapes in small clusters around the edges and between cheeses. Fan apple and pear slices in curved lines so they look like little rainbows. Tuck dried fruit near nuts and cheeses for easy pairing.
Place veggies near the dips and hummus bowls. Spread colors around so no one area looks too beige. Leave enough space so guests can grab pieces without knocking everything over.
Step 7: Fill bowls with dips, nuts, and extras
Spoon jams, honey, and mustard into the bowls you placed earlier. Add hummus, ranch, or yogurt dip to the remaining bowls. Top hummus with a drizzle of olive oil or a sprinkle of paprika for a quick glow-up.
Fill smaller bowls with nuts, olives, and pickles. Keep briny items away from crackers so they do not get soggy. Add small spoons or forks to anything messy.
Step 8: Add Thanksgiving details and garnish
Scatter roasted pumpkin seeds or pepitas in a few open spots. Add a tiny bowl of candy corn or seasonal chocolate pieces if your crowd likes sweets. Place mini pumpkin-shaped cheeses or cheese balls near the center.
Tuck fresh rosemary or thyme sprigs along the edges and near cheeses. These herbs add color and a subtle holiday aroma. Step back, check for empty gaps, and fill them with extra crackers, fruit, or nuts.
Step 9: Chill smart and serve
If you prep early, cover the board loosely with plastic wrap and chill it. Add crackers and bread right before serving so they stay crisp. Pull the board out about 20 minutes before guests arrive so cheeses soften slightly.
Place small plates and napkins nearby so guests feel comfortable grazing. Keep a trash bowl or small bin close for toothpicks and olive pits. Refill popular items from your backup stash as the board empties.
Recipe Variations
- Gluten-free: Use gluten-free crackers and bread, and double up on veggies and nuts.
- Vegan: Swap dairy cheese with plant-based cheeses, use hummus and bean dips, and choose vegan deli slices or marinated tofu cubes.
- Low carb: Focus on meats, cheeses, olives, nuts, low sugar dips, and plenty of veggies; skip bread and most crackers.
- Kid-friendly: Add mild cheeses, turkey slices, simple crackers, baby carrots, apple slices, and a small bowl of chocolate chips or mini marshmallows.
- Spicy version: Include spicy salami, pepper jack cheese, hot honey, and a spicy mustard or salsa-style dip.
- Nut-free: Skip nuts and use seeds like pumpkin or sunflower seeds for crunch instead.
Ways to Serve Thanksgiving Charcuterie Board Idea
- Set it out as a pre-dinner appetizer while the turkey finishes roasting.
- Use it as a light lunch for the cooking crew while you prep the main meal.
- Turn it into a kid-friendly grazing board with extra fruit, cheese cubes, and crackers.
- Serve it as a cozy movie-night snack platter during Thanksgiving weekend.
- Offer it as a no-cook dinner option the night before the big feast when you feel tired of cooking.
Storage Success
Store leftover meats and cheeses in separate airtight containers in the fridge and use them within 3 to 4 days. Keep crackers and bread at room temperature in sealed bags so they stay crisp. Toss any fruit or veggies that sat out for more than two hours, and refresh the next day with new slices.
Save leftover dips, jams, and honey in their original jars or covered containers and use them through the week. Use extra meats and cheeses in sandwiches, omelets, or lunchboxes so nothing goes to waste.