
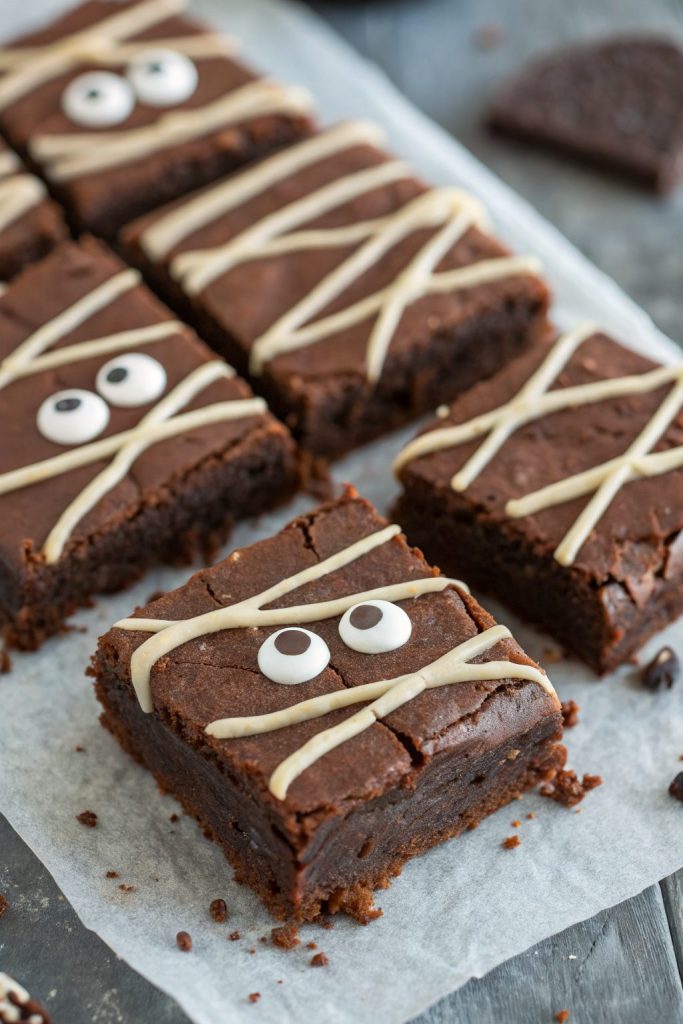
Spooky Mummy Brownies Recipe tastes like a rich, fudgy brownie hugged by sweet vanilla frosting with a playful crunch from candy eyes, and it comes together in about 45 minutes start to finish. This Halloween dessert works perfectly for kids’ parties, office potlucks, or anyone who wants a cute treat that still tastes like a real bakery-style brownie. I tested these with my nieces last October, and they judged them “too spooky to eat” for about 30 seconds before inhaling two each.
Why You Should Try This Spooky Mummy Brownies Recipe
This Spooky Mummy Brownies Recipe gives you thick, chewy, chocolatey bars that hold their shape under frosting but still taste soft and fudgy. You decorate them in minutes with simple zigzags of white frosting and candy eyes, so they look like you spent way more time than you actually did.
You can use a boxed brownie mix or your favorite homemade brownie base, so this recipe fits both busy weeknights and full baking days. Kids can help pipe the mummy bandages, and adults can help “quality check” the edges, which always seem to disappear first.
“These spooky mummy brownies vanished from our Halloween table in under ten minutes, and everyone asked for the recipe ★★★★★”
Ingredients You’ll Need
Brownie base
You can use a boxed mix or a from-scratch batter. I’ll give both options.
Option 1: Boxed brownie mix (easiest)
Use a family-size box that fits a 9×13 pan, such as:
- 1 box brownie mix, 18–19 oz (Ghirardelli, Betty Crocker, or your favorite brand)
- Ingredients listed on the box (usually eggs, oil or melted butter, and water)
I like Ghirardelli dark chocolate mix because it bakes up thick and fudgy and tastes close to bakery brownies.
Option 2: Homemade fudgy brownies
- 1 cup (2 sticks) unsalted butter, melted and slightly cooled
- 2 cups granulated sugar
- 4 large eggs, room temperature
- 2 teaspoons vanilla extract
- 1 cup unsweetened cocoa powder (natural or Dutch process both work)
- 1 cup all-purpose flour, spooned and leveled
- 1 teaspoon fine sea salt
- 1 cup chocolate chips or chunks (optional, but highly encouraged for extra gooey pockets)
Mummy decoration
- 1 ½ to 2 cups white frosting
- You can use store-bought vanilla frosting for a shortcut.
- If you prefer homemade, use a simple buttercream:
- ½ cup unsalted butter, softened
- 2 cups powdered sugar
- 1–2 tablespoons milk or heavy cream
- 1 teaspoon vanilla extract
- Pinch of salt
- Candy eyeballs (about 24–36 pieces, depending on how many brownies you cut)
- Optional: a tiny bit of cocoa powder or melted chocolate to dot under the eyes if you want a “shadow” effect
Equipment list
- 9×13 inch baking pan
- Parchment paper or nonstick spray
- Mixing bowls (one large, one medium)
- Whisk and rubber spatula
- Measuring cups and spoons
- Wire cooling rack
- Piping bag with small flat or round tip
- Shortcut: use a zip-top bag and snip a small corner
- Offset spatula or butter knife
- Sharp knife or bench scraper for clean cuts
Tips & Tricks
- Line the pan with parchment and leave overhang on two sides so you can lift the whole brownie slab out for easy cutting.
- Use room temperature eggs so they mix smoothly into the batter and give you a shiny, crackly top.
- Stir the brownie batter just until no dry streaks remain so you keep the texture fudgy, not tough.
- Cool brownies completely before decorating so the frosting holds its shape and does not melt.
- Chill the baked brownies in the fridge for 30 minutes before cutting to get neat, bakery-style squares.
- Use a warm knife (run under hot water and wipe dry) to slice cleanly through the brownies.
- If the frosting feels too thick to pipe, thin it with a teaspoon of milk at a time until it flows but still holds lines.
- If the frosting feels too thin, add a few spoonfuls of powdered sugar and stir again.
- Press candy eyes into the frosting while it still feels soft so they stick firmly.
- Cut smaller brownie rectangles for kids’ parties, since little hands love mini mummy brownies.
How to Make Spooky Mummy Brownies Recipe
Step 1: Prep the pan and oven
Preheat your oven to 350°F (175°C).
Line a 9×13 pan with parchment paper, leaving a bit of overhang on the long sides, or grease the pan well with nonstick spray.
Set the pan aside while you mix the batter.
Step 2: Mix the brownie batter (boxed mix version)
If you use a boxed mix, pour the dry mix into a large bowl.
Add the eggs, oil or melted butter, and water exactly as the package directs.
Whisk just until the batter looks smooth, then fold in chocolate chips if you want extra chocolate pockets.
Step 3: Mix the brownie batter (homemade version)
In a large bowl, whisk the melted butter and sugar until the mixture looks thick and glossy.
Add the eggs and vanilla, and whisk until the mixture looks slightly lighter in color and smooth.
Sift or sprinkle in the cocoa powder, flour, and salt, then gently fold with a spatula until no dry streaks remain.
Fold in chocolate chips or chunks if you use them, and stop mixing as soon as they look evenly distributed.
Step 4: Bake the brownies
Pour the batter into the prepared pan and spread it into an even layer with a spatula.
Tap the pan gently on the counter to pop any large air bubbles.
Bake at 350°F for 22–28 minutes for a boxed mix or 25–30 minutes for homemade, depending on your oven.
Check with a toothpick in the center; you want moist crumbs clinging to it, not wet batter.
Step 5: Cool completely
Place the pan on a wire rack and let the brownies cool completely in the pan.
If you have time, chill the cooled pan in the fridge for 30 minutes to firm the brownies for easier cutting.
Lift the brownies out using the parchment overhang and place the slab on a cutting board.
Step 6: Make the frosting (if using homemade)
Beat the softened butter in a medium bowl until it looks creamy and smooth.
Add powdered sugar, vanilla, salt, and 1 tablespoon of milk or cream.
Beat until the frosting looks fluffy and spreadable, adding a bit more milk if it feels too thick or more powdered sugar if it feels too thin.
Scrape the frosting into a piping bag fitted with a small flat or round tip, or into a zip-top bag.
Step 7: Cut the brownies into mummy shapes
Use a sharp knife to trim the very edges if you want perfectly neat sides.
Cut the slab into rectangles or squares, about 2×3 inches each, which gives you a good “mummy” shape.
Wipe the knife between cuts to keep the sides clean.
Step 8: Pipe the mummy bandages
Snip a small corner off the zip-top bag if you use one.
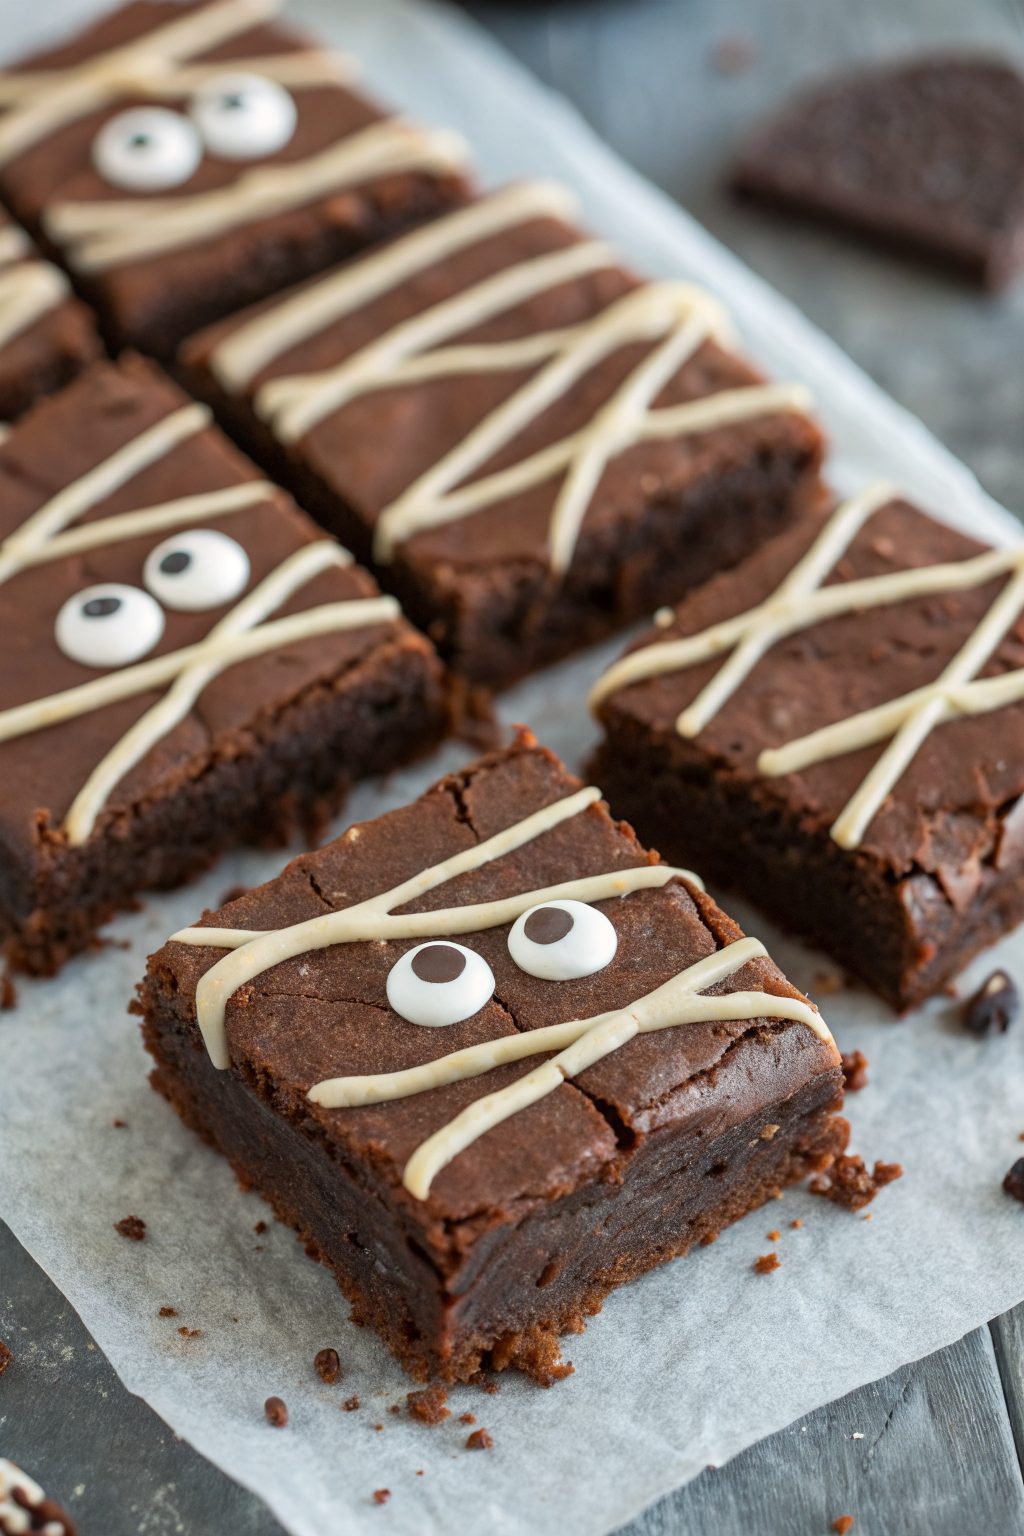
Hold the bag over a brownie and pipe thin lines of frosting back and forth across the surface, slightly angled, to mimic mummy bandages.
Leave a small open area near the top third of each brownie where the eyes will sit.
Repeat with all brownies, varying the direction of the lines so each mummy looks a little different.
Step 9: Add the candy eyes
Gently press two candy eyeballs into the open space on each brownie.
Nestle them slightly into the frosting so they stay put but still peek out clearly.
If you want extra drama, dab a tiny bit of melted chocolate or cocoa powder under the eyes to give a shadow effect.
Step 10: Chill briefly and serve
Place the finished mummy brownies on a tray or back into the pan.
Chill them in the fridge for 15–20 minutes so the frosting sets and the eyes stay secure.
Serve them at room temperature so the brownie texture tastes soft and fudgy.
What to Serve with Spooky Mummy Brownies Recipe
These spooky mummy brownies pair perfectly with cold milk, hot cocoa, or a simple vanilla or chocolate milkshake. You can set up a Halloween dessert board with the brownies, sliced apples with caramel dip, and a bowl of popcorn for a fun mix of textures. Add some orange slices or strawberries to bring a little freshness and color to the table. If you host a party, stack the brownies on a tiered stand and tuck in plastic spiders or candy corn around them for extra spooky vibes.
Storage Options
- Store leftover mummy brownies in an airtight container at room temperature for up to 3 days, keeping them in a single layer or with parchment between layers so the frosting lines stay neat.
- If your kitchen runs warm, keep them in the fridge for up to 5 days and let them sit at room temperature for 15–20 minutes before serving.
- Freeze undecorated brownie squares tightly wrapped for up to 2 months, then thaw, decorate, and serve.
- Freeze fully decorated brownies on a tray until firm, then wrap individually and store up to 1 month, thawing in the fridge and then bringing to room temperature before serving.
Spooky Mummy Brownies Recipe
Ingredients
Instructions
- Preheat the oven to 350°F (175°C). Line a 9x13-inch baking pan with parchment paper, leaving overhang on two sides, or grease well with nonstick spray.
- Pour the boxed brownie mix into a large mixing bowl. Add the eggs, oil or melted butter, and water according to the package directions.
- Whisk just until the batter is smooth, then fold in chocolate chips or chunks if using.
- In a large bowl, whisk together the melted butter and granulated sugar until the mixture looks thick and glossy.
- Add the eggs and vanilla extract and whisk until the mixture looks slightly lighter in color and smooth.
- Sprinkle in the cocoa powder, flour, and fine sea salt. Gently fold with a spatula just until no dry streaks remain.
- Fold in chocolate chips or chunks if using, stopping as soon as they are evenly distributed.
- Spread the prepared batter into the lined pan, smoothing it into an even layer with a spatula. Tap the pan gently on the counter to release large air bubbles.
- Bake at 350°F (175°C) for 22–28 minutes for a boxed mix or 25–30 minutes for homemade brownies, or until a toothpick inserted in the center comes out with moist crumbs but no wet batter.
- Place the pan on a wire rack and let the brownies cool completely in the pan. For easier cutting, chill the cooled pan in the refrigerator for about 30 minutes.
- Beat the softened butter in a medium bowl until creamy and smooth.
- Add powdered sugar, vanilla extract, a pinch of salt, and 1 tablespoon of milk or heavy cream. Beat until fluffy and spreadable, adding a bit more milk if too thick or more powdered sugar if too thin.
- Transfer the frosting to a piping bag fitted with a small flat or round tip, or into a zip-top bag to use as a piping bag.
- Lift the cooled brownie slab out of the pan using the parchment overhang and place it on a cutting board. Trim the very edges if you want perfectly neat sides.
- Cut the brownies into rectangles or squares about 2x3 inches for a mummy shape, wiping the knife between cuts for clean edges.
- If using a zip-top bag, snip a small corner off. Pipe thin lines of frosting back and forth over each brownie, slightly angled, to resemble mummy bandages. Leave a small open space near the top third for the eyes.
- Gently press two candy eyeballs into the open space on each brownie so they sit slightly nestled into the frosting. Add a tiny dab of melted chocolate or cocoa powder under the eyes if you want a shadow effect.
- Place the decorated brownies on a tray and chill for 15–20 minutes so the frosting sets and the eyes stay secure. Serve at room temperature for the best fudgy texture.
Notes
Approximate per serving (1 of 24 brownies, using homemade brownie base with frosting and candy eyes): 260–300 calories; fat 14–16 g; saturated fat 8–9 g; carbohydrates 34–38 g; fiber 2 g; sugars 27–30 g; protein 3–4 g; sodium 160–220 mg. Values will vary based on whether you use boxed mix or homemade, frosting type, candy decorations, and portion size.
Leave a Reply