
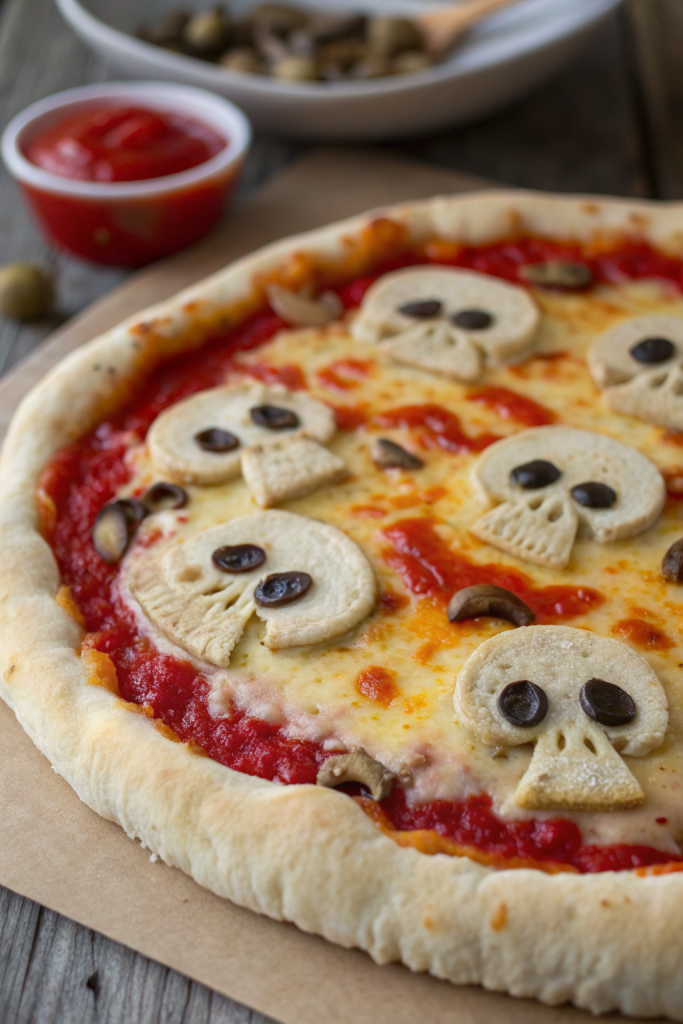
Skulls Mushroom Pizza Recipe tastes like garlicky cheesy heaven with pockets of savory mushrooms tucked into spooky skull shapes, perfect for Halloween fans or anyone who loves fun food, and it takes about 1 hour start to finish with shortcuts. This recipe works for party snacks, kid-friendly dinners, or horror-movie nights when everyone wants something playful but still legit tasty. I tested this while wearing skeleton socks, so yes, I take the theme seriously.
Why Make This Skulls Mushroom Pizza Recipe at Home
You control everything at home, from how spooky the skulls look to how cheesy and garlicky the pizza tastes. You also skip greasy takeout and use better mushrooms, better cheese, and way more flavor.
Kids and adults both go wild for the skull shapes, so this recipe turns into instant party food. You can prep the dough and fillings ahead, then assemble and bake right before guests arrive.
“This Skulls Mushroom Pizza Recipe vanished from the tray in minutes and became our new Halloween tradition. ★★★★★”
Ingredients You Need
Dough options
- 1 pound pizza dough
- Use store bought refrigerated dough to save time.
- Choose regular or thin crust style.
- You can also use homemade dough if you already keep a batch in the fridge.
Mushroom skull filling
- 10 ounces mushrooms, finely chopped
- Cremini or baby bella mushrooms give deep flavor.
- White button mushrooms work if that is what you have.
- 2 tablespoons olive oil
- 2 tablespoons unsalted butter
- 3 cloves garlic, minced
- 1 small shallot or 1/4 small onion, minced
- 1 teaspoon fresh thyme leaves or 1/2 teaspoon dried thyme
- 1/2 teaspoon dried oregano
- 1/4 teaspoon crushed red pepper flakes, optional
- 1/2 teaspoon kosher salt, plus more to taste
- 1/4 teaspoon black pepper
- 2 tablespoons grated Parmesan cheese
- 2 tablespoons cream cheese or mascarpone
- This gives a creamy, scoopable filling that holds inside the skull shapes.
Cheese and sauce
- 1 cup low moisture mozzarella, shredded
- 1/4 cup Parmesan, grated
- 1/2 to 3/4 cup pizza sauce or marinara
- Jarred sauce works great. I like a thicker sauce so it does not run.
- 1 tablespoon olive oil for brushing
Fun skull details
- 8 to 12 black olives, sliced into rings and small bits
- Use rings for eyes and tiny pieces for noses or cracks.
- Extra mushrooms, thinly sliced, to outline skull shapes if you want.
Seasoning finish
- 1 teaspoon Italian seasoning or a mix of oregano and basil
- Pinch of flaky salt
- Fresh parsley, chopped, optional
Equipment
- Skull shaped baking pan or skull silicone mold
- A skull cakelet pan or skull muffin pan works well.
- If you do not own one, you can still shape skulls by hand on a sheet pan.
- Sheet pan lined with parchment
- Rolling pin or clean bottle
- Skillet for cooking mushrooms
- Mixing bowls
- Pastry brush or clean small brush
- Spoon for filling molds
- Knife or pizza cutter
Tips & Mistakes
- Roll the dough slightly thicker than usual so it holds the skull shape and does not tear.
- Grease the skull pan well with oil or butter so the dough releases easily.
- Chill the mushroom filling slightly so it thickens and stays inside the dough pockets.
- Do not overload each skull with filling or the seams may burst in the oven.
- Pinch the dough seams firmly and tuck them underneath to keep the skulls sealed.
- Keep the oven hot, at least 425°F, so the dough puffs and browns nicely.
- Use low moisture mozzarella so the skulls stay cheesy without turning watery.
- Taste the mushroom mixture before filling and adjust salt, since bland filling ruins the whole batch.
- Let the skulls rest a few minutes after baking so the cheese sets and the shapes stay sharp.
- Add olive eyes after baking if they slide around too much in the hot oven.
How to Make Skulls Mushroom Pizza Recipe
Step 1: Prep the dough and pan
Preheat your oven to 425°F. Lightly oil your skull pan or line a sheet pan with parchment if you shape skulls by hand. Bring the pizza dough to room temperature for 20 to 30 minutes so it stretches without snapping back.
Step 2: Cook the mushroom filling
Heat a skillet over medium heat and add the olive oil and butter. Add the shallot and cook 2 to 3 minutes until it softens and turns fragrant. Stir in the garlic and cook 30 seconds so it smells toasty, not bitter.
Add the chopped mushrooms, salt, and pepper. Cook 7 to 10 minutes, stirring often, until the mushrooms release liquid and that liquid cooks off. The mixture should look dry and slightly browned.
Stir in thyme, oregano, and red pepper flakes. Turn off the heat and mix in Parmesan and cream cheese until the mixture turns creamy and thick. Taste and adjust seasoning, then let it cool to lukewarm so it does not melt the dough.
Step 3: Roll and cut the dough
Lightly flour your counter and place the dough on it. Roll the dough to about 1/8 to 1/4 inch thick. Cut pieces slightly larger than each skull cavity so you can press the dough up the sides.
If you shape skulls by hand, cut the dough into rectangles or ovals. You will fold and pinch them around the filling to form skull shapes. Keep any extra dough covered so it does not dry out.
Step 4: Line the skull pan with dough
Press each dough piece into a skull cavity, pushing it into the eyes, nose, and jaw lines. Leave some dough hanging over the edges so you can seal the top. Brush the inside lightly with olive oil to help crisp the crust.
If you work on a sheet pan, lay each dough piece flat and plan to fold it over the filling. You can pinch in cheekbones and jawlines after you seal them. The shapes do not need perfection to look spooky and fun.
Step 5: Fill with mushroom mixture and cheese
Spoon a tablespoon or two of the mushroom filling into each dough lined skull. Top with a sprinkle of mozzarella and a pinch of Parmesan. Leave a little space at the top so the filling does not push out when you seal the dough.
If you want sauce inside, add just a small spoonful under the cheese. Thick sauce works best so it does not leak. You will still serve extra sauce on the side or under the skulls.
Step 6: Seal the skulls
Cut more dough pieces to cover the tops. Place a piece over each filled skull and pinch the edges firmly to seal with the bottom layer. Trim extra dough and tuck the seam inside the cavity so the front of the skull looks smooth.
If you work on a sheet pan, fold the dough over the filling and pinch the edges closed. Shape the top into a skull by pressing in eye sockets and a jawline with your fingers or the back of a spoon. A little unevenness adds character.
Step 7: Add sauce and cheese on top
Brush each skull with a thin layer of pizza sauce. Sprinkle mozzarella and Parmesan over the tops, keeping the cheese lighter over the eye and nose areas so the skull details show. Dust with Italian seasoning for extra flavor.
If you want cleaner skull outlines, keep most sauce and cheese underneath and only brush the tops with olive oil and seasoning. You can drizzle warm sauce on the plate later. Both styles taste great.
Step 8: Bake until golden
Place the pan in the oven and bake 15 to 20 minutes. The skulls should puff, turn golden, and feel firm when you tap them. If the bottoms still look pale, bake a few more minutes.
Remove the pan and let the skulls rest 5 minutes. Run a small knife around the edges if needed, then flip the pan onto a board to release them. If you shaped them on a sheet pan, just slide a spatula under each one.
Step 9: Add skull faces and serve
Press olive rings into the eye sockets while the skulls still feel warm. Use small olive bits or tiny mushroom pieces for noses or cracks. Sprinkle with parsley and a pinch of flaky salt.
Serve with warm pizza sauce on the side for dipping or spoon some sauce onto plates and set the skulls on top. Kids love to dip them like spooky pizza pockets. Adults usually pretend they made them for the kids, then eat half the tray.
Variations I've Tried
I swap half the mushrooms with finely chopped spinach for a green skull filling that still tastes cheesy and savory. I also tried a version with caramelized onions and mushrooms together, which tasted sweet and rich, almost like French onion pizza in skull form. Pepperoni skulls work too, with chopped pepperoni mixed into the mushroom filling and a little extra mozzarella.
You can go extra spooky and use black olive tapenade inside with mushrooms for a darker filling. A white pizza version skips tomato sauce and uses garlic butter and extra cheese, which tastes rich and cozy. Vegan friends can enjoy a version with dairy free mozzarella and cream cheese style spread, plus olive oil instead of butter.
How to Serve Skulls Mushroom Pizza Recipe
Serve Skulls Mushroom Pizza Recipe hot on a big platter with a bowl of warm pizza sauce or marinara in the center for dipping. Add a simple green salad, sliced cucumbers, or carrot sticks to balance the richness. Kids love these in lunchboxes, so pack a cooled skull with a small container of sauce.
You can also set them out as Halloween party snacks with fruit punch, sparkling water, or flavored seltzer. They reheat well, so keep a second tray ready to pop into the oven when the first batch disappears.
How to store
- Cool the skulls completely, then store them in an airtight container in the fridge for up to 3 days.
- Freeze on a parchment lined tray until firm, then move to a freezer bag and keep up to 2 months.
- Reheat from the fridge in a 350°F oven for 8 to 10 minutes until hot and crisp again.
- Reheat from frozen at 350°F for 15 to 20 minutes, or until the centers feel hot and the outsides look golden.