
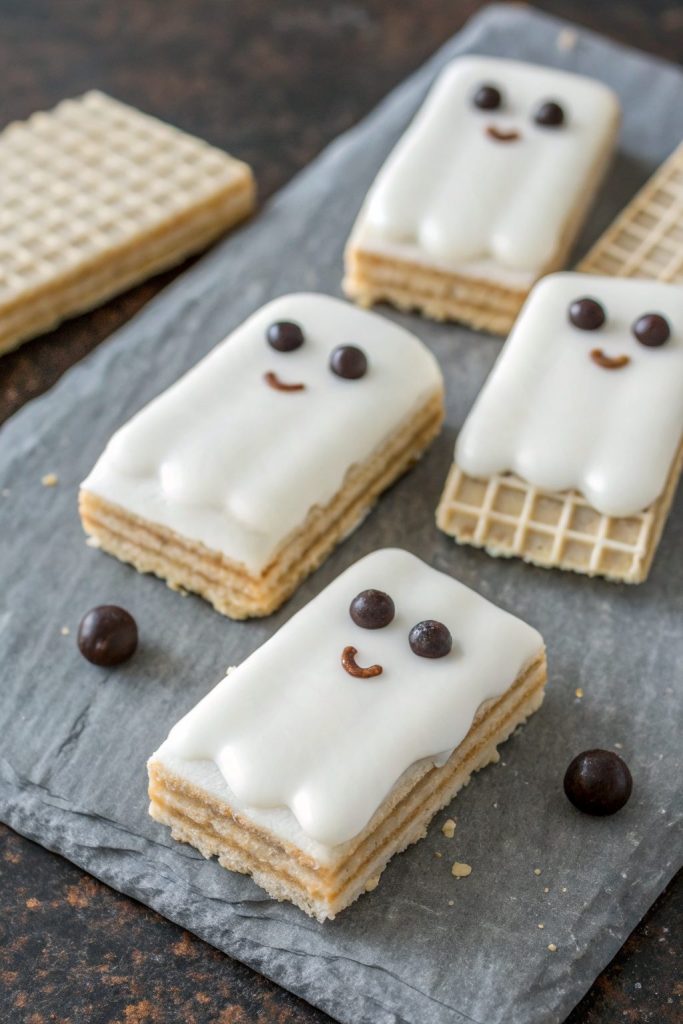
Chocolate Dipped Ghost Wafer Cookies Recipe tastes like a cross between a crunchy sugar cookie and a chocolate-dipped s’more, with just enough spooky charm to make kids squeal and adults “taste test” half the batch. This recipe works best for busy parents, Halloween party hosts, or anyone who wants a cute dessert in under 45 minutes from start to finish. I first made these for a neighborhood trunk-or-treat, and my own kids tried to hide a plate of them in their rooms.
Why You Should Try This Chocolate Dipped Ghost Wafer Cookies Recipe
These ghost wafer cookies look bakery-level adorable, but you build them from simple store-bought vanilla wafers and melting chocolate. You skip complicated dough, chilling times, and cookie cutters, yet still end up with a tray that steals the spotlight on any Halloween dessert table.
You also customize them easily. Change the chocolate, add sprinkles, or use different candy eyes and still keep the same basic method. The recipe scales well, so you can make a dozen for a movie night or four dozen for a classroom party without losing your sanity.
“These Chocolate Dipped Ghost Wafer Cookies disappeared from the dessert table in ten minutes flat and everyone begged for the recipe ★★★★★”
Ingredients You’ll Need
You can tweak this Chocolate Dipped Ghost Wafer Cookies Recipe with what you already keep in your pantry. I like to use classic Nabisco Nilla Wafers, but any sturdy vanilla wafer or shortbread-style oval cookie holds up well.
Main ingredients
-
1 box vanilla wafer cookies
- Nilla Wafers or a similar brand work great.
- Choose a brand that tastes buttery and not too crumbly so the cookies stay intact while you dip.
-
1 1/2 cups white chocolate chips or vanilla candy melts
- Candy melts give a smoother, more forgiving coating for beginners.
- White chocolate chips taste richer but need a teaspoon of neutral oil to thin.
-
1 teaspoon neutral oil (canola, vegetable, or refined coconut), optional
- Add this if the melted chocolate looks too thick.
- Skip flavored oils, since they can fight with the vanilla and chocolate.
-
1/2 cup semisweet or milk chocolate chips, for extra drizzling or details, optional
- Use this if you want chocolate “hair,” outlines, or little spooky accents.
- A small squeeze bottle or piping bag helps you control the drizzle.
-
Candy eyes (small or medium size)
- Wilton candy eyes hold up well and stay bright.
- If you cannot find them, use mini chocolate chips or black decorating gel.
-
Black decorating gel or melted dark chocolate, for mouths
- Gel makes quick work of faces.
- Melted dark chocolate gives a cleaner look if you use a toothpick or piping bag.
Optional decorations
- Halloween sprinkles or nonpareils
- Crushed chocolate cookie crumbs for a “graveyard dirt” look
- Orange or purple sanding sugar
- Colored candy melts for accent drizzles
Use these to customize the ghosts for different events, like school parties or family movie nights.
Equipment list
You do not need fancy tools for this Chocolate Dipped Ghost Wafer Cookies Recipe, which makes it perfect for baking with kids.
- 2 microwave-safe bowls (one for white chocolate, one for dark)
- Silicone spatula
- Fork or dipping tool
- Baking sheet
- Parchment paper or silicone baking mat
- Toothpicks or a small piping bag (for mouths and details)
- Small squeeze bottle, optional, for neat chocolate drizzles
- Cooling rack, optional, if you want extra airflow under the cookies
Tips & Tricks
- Bring cookies to room temperature so they do not crack when you dip them in warm chocolate.
- Line your baking sheet with parchment so the ghosts release cleanly and keep their smooth bottoms.
- Melt chocolate in short 20 to 30 second bursts in the microwave and stir between each burst to avoid scorching.
- Add 1 teaspoon neutral oil at a time if the melted chocolate looks thick or clumpy.
- Work in small batches of 6 to 8 cookies so the chocolate stays fluid and the faces stay neat.
- Press candy eyes onto the cookies while the coating still feels wet and glossy so they stick firmly.
- Use a toothpick to draw tiny mouths with melted dark chocolate if you want more control than gel.
- Chill dipped cookies for 10 to 15 minutes so the coating sets quickly and you avoid fingerprints.
- Keep kids on “eye duty” and “sprinkle duty” so they help without getting near the hot chocolate bowl.
- Test one cookie first to check coating thickness and adjust with more chocolate or oil if needed.
How to Make Chocolate Dipped Ghost Wafer Cookies Recipe
Step 1: Prep the workspace
Line a baking sheet with parchment paper or a silicone mat. Set out your vanilla wafers in a single layer so you can grab them quickly. Open the candy eyes and decorating gel so you do not fumble with packaging once the chocolate melts.
Step 2: Melt the white chocolate
Place white chocolate chips or vanilla candy melts in a microwave-safe bowl. Heat in 20 to 30 second bursts, stirring well after each round, until the chocolate turns smooth and glossy. If it looks too thick, stir in 1 teaspoon neutral oil until you reach a nice dipping consistency.
Step 3: Dip the wafers
Drop one wafer cookie into the melted white chocolate. Use a fork to flip it and coat both sides, then lift it and tap the fork gently on the edge of the bowl so extra chocolate drips off. Slide the coated cookie onto the prepared baking sheet and nudge it into a ghost-like oval shape with the fork or a small offset spatula.
Step 4: Add the ghost faces
While the coating on each cookie still looks wet, press two candy eyes near the top third of the cookie. Leave a little space between them so the ghost looks cute instead of grumpy. Let the coating set slightly, then use black decorating gel or a toothpick dipped in melted dark chocolate to draw small “O” mouths or wiggly smiles.
Step 5: Add extra decorations
If you want extra flair, drizzle melted semisweet or milk chocolate over a few ghosts. Sprinkle sanding sugar or Halloween sprinkles around the bottom to mimic costumes or shadows. Keep some ghosts plain so the tray looks balanced and not too busy.
Step 6: Chill and set
Place the baking sheet in the fridge for 10 to 15 minutes so the chocolate firms up. Check one cookie by gently lifting it from the parchment; the coating should feel solid and not tacky. Once everything sets, transfer the ghosts to a serving plate or airtight container.
Step 7: Clean edges and serve
If any ghosts have chocolate “feet” around the edges, trim them gently with a small knife. Arrange the cookies on a platter in loose rows, like a little ghost parade. Serve them at room temperature so the chocolate tastes smooth and the wafers stay crisp.
What to Serve with Chocolate Dipped Ghost Wafer Cookies Recipe
These Chocolate Dipped Ghost Wafer Cookies pair perfectly with hot chocolate, warm apple cider, or a big pitcher of cold milk. I like to set them beside a bowl of fresh fruit like strawberries, grapes, or apple slices to balance the sweetness. You can also serve them with popcorn for a Halloween movie night snack board that feels fun and not fussy. Add a small bowl of extra candy eyes on the table so kids can decorate plates and turn everything into a spooky scene.
Storage Options
- Store cooled cookies in a single layer in an airtight container at room temperature for 3 to 4 days.
- If you need to stack them, place parchment between layers so the faces stay neat.
- Keep them in the fridge for up to 1 week if your kitchen runs warm, and let them sit at room temperature for 10 minutes before serving.
- Freeze the cookies on a baking sheet until solid, then move them to a freezer bag for up to 2 months.
- Thaw frozen cookies in the fridge overnight or on the counter for 20 to 30 minutes, and skip reheating so the chocolate coating stays intact.
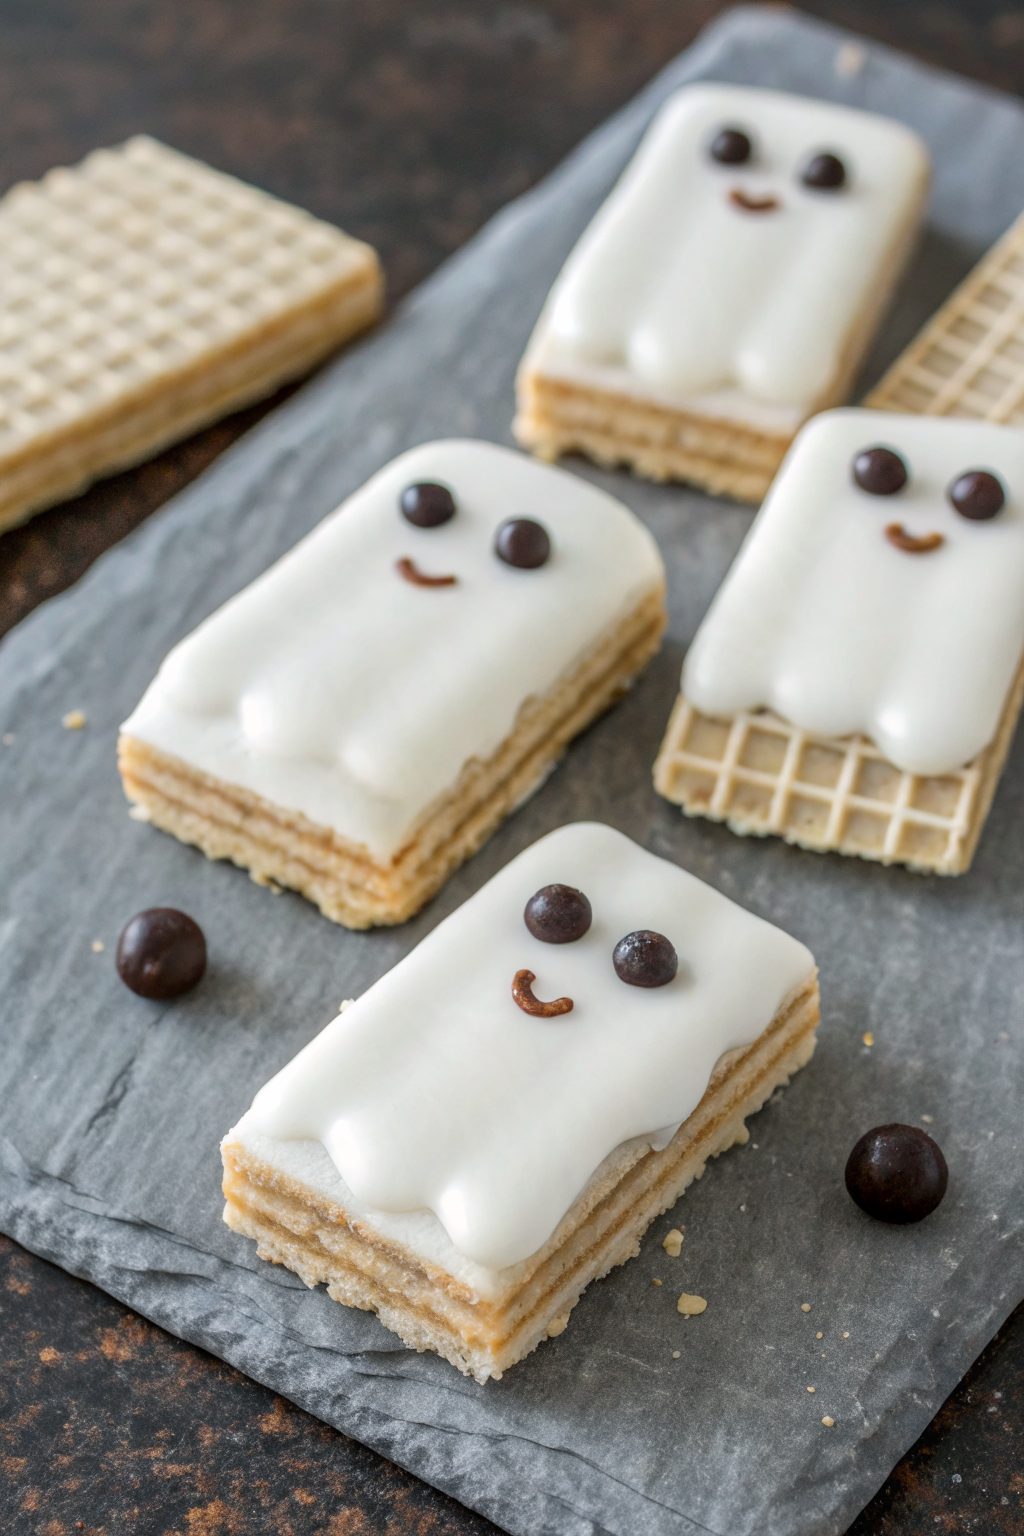
Chocolate Dipped Ghost Wafer Cookies Recipe
Ingredients
Instructions
- Line a baking sheet with parchment paper or a silicone mat. Arrange the vanilla wafer cookies nearby and open the candy eyes and decorating gel so they are ready to use.
- Place the white chocolate chips or vanilla candy melts in a microwave-safe bowl. Heat in 20–30 second bursts, stirring well after each burst, until smooth and glossy. If the mixture seems too thick for dipping, stir in up to 1 teaspoon neutral oil until it reaches a good dipping consistency.
- Drop one vanilla wafer into the melted white chocolate and use a fork to flip and fully coat it. Lift the cookie with the fork and gently tap the fork on the edge of the bowl so excess chocolate drips off. Slide the coated cookie onto the prepared baking sheet and nudge it into an elongated, ghost-like oval shape if desired.
- While the coating is still wet, press two candy eyes near the top third of the cookie, leaving a bit of space between them. Repeat the dipping and eye-placing process with the remaining cookies, working in small batches so the coating does not set before you add the eyes.
- Let the coating sit for a minute or two, then use black decorating gel or a toothpick dipped in melted dark chocolate to draw small “O” mouths or wiggly smiles on each ghost wafer cookie.
- If desired, melt the semisweet or milk chocolate chips in a separate bowl in short microwave bursts, stirring until smooth. Drizzle this chocolate over some of the ghosts or add hairlines and other spooky accents, then finish with sprinkles or sanding sugar as desired.
- Place the baking sheet in the refrigerator for 10–15 minutes, or until the chocolate coating is firm and no longer tacky. Gently lift a cookie to test that it has set completely.
- Once set, trim any excess chocolate from the edges with a small knife if needed. Arrange the ghost wafer cookies on a serving platter in loose rows and serve at room temperature so the wafers stay crisp and the chocolate coating is pleasantly smooth.
Notes
Approximate for 1 cookie (about 24 cookies total): 90–110 calories; fat 5–6 g; saturated fat 3–4 g; carbohydrates 11–13 g; fiber 0–1 g; sugars 8–10 g; protein 1–2 g; sodium 60–90 mg. Values will vary based on cookie brand, type of chocolate, decorations used, and portion size.
Leave a Reply