
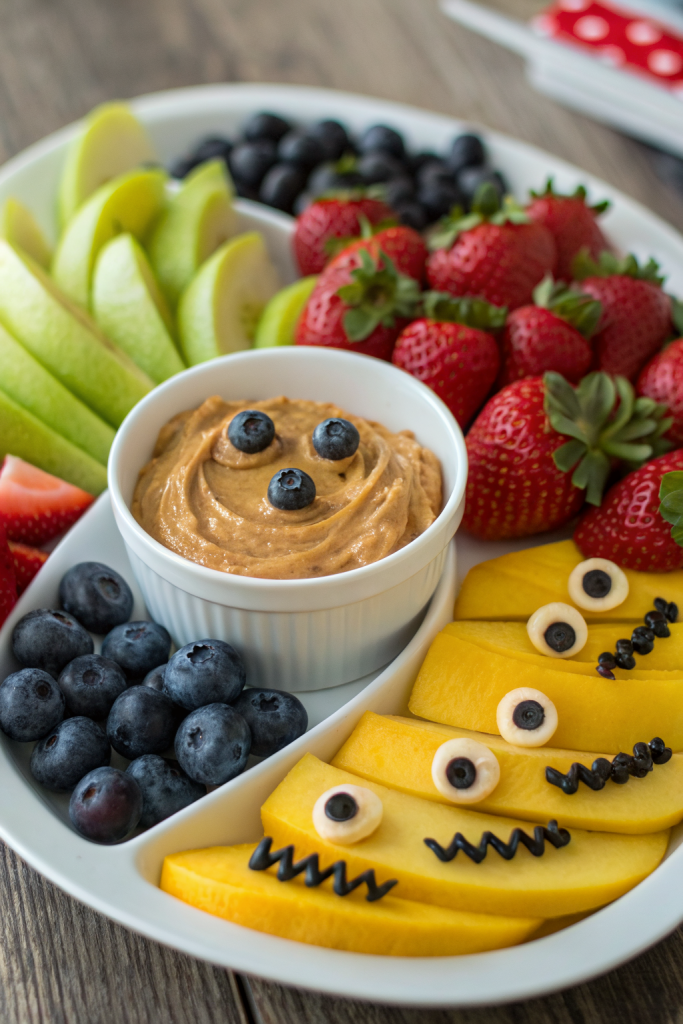
Halloween Fruit Platter Idea tastes bright, juicy, and just spooky enough to make kids squeal and adults sneak extra grapes. It works for busy parents, party hosts, and last minute Halloween gatherings, and you can pull it together in about 20 to 30 minutes. I tested this platter on my own family, and the “fruit over candy” crowd finally won a round.
Why Halloween Fruit Platter Idea Is Worth It
This Halloween Fruit Platter Idea gives you a colorful, fun centerpiece that still feels light and fresh. You get all the Halloween vibes with far less sugar, and kids still feel like they hit the jackpot.
You can prep most of it ahead, which saves stress on party day. It also fits almost any diet at the table, so you avoid making three different desserts.
“This Halloween Fruit Platter Idea disappeared faster than the candy bowl and guests asked for the ‘recipe’ before they left.” ★★★★★
Ingredients You Need
Fresh fruit
Use what looks ripe and budget friendly, but these choices give the best color contrast and shapes.
-
Green grapes
Great for “monster eyes” and “witch fingers.” Seedless grapes work best for kids. -
Red or black grapes
Add a darker, moodier color. I like black seedless grapes for a spooky look. -
Strawberries
Use for “bloody hearts” or to dip in white chocolate for “ghosts.” Pick medium berries so they hold details. -
Blueberries
Perfect as pupils for eyeballs or to fill gaps on the platter. -
Mandarin oranges or clementines
Peel them and add a tiny celery stick to turn them into mini pumpkins. -
Bananas
Slice them into chunks for banana ghosts. Use mini chocolate chips or melted chocolate for eyes and mouths. -
Kiwi
Peel and slice into rounds for monster faces. The bright green color pops against darker fruit. -
Pineapple rings or chunks
Fresh or canned in juice works. Cut rings into bat wings or triangles for teeth. -
Apple slices
Use red or green apples. Toss slices in lemon juice or orange juice so they do not brown. -
Pomegranate arils
They look like little rubies and double as “monster drool” or “blood drops.”
Optional fun extras
- Mini chocolate chips for eyes on ghosts and monsters
- Dark chocolate chips or melted dark chocolate to draw faces
- Candy eyeballs for a shortcut on fruit monsters
- Shredded coconut to sprinkle as “spider webs”
- Pretzel sticks for stems or arms on fruit creatures
Pantry shortcuts and brand notes
- Use precut fruit trays from the store if you feel short on time, then just arrange and decorate.
- Shelf stable canned pineapple and mandarin segments in juice work well if fresh fruit looks sad.
- Grab a small tube of store bought decorating gel or icing to draw faces if you do not want to melt chocolate.
- Prewashed bagged grapes and berries save time on busy party days.
Equipment list
- Large serving platter, wooden board, or baking sheet
- Small bowls or ramekins for loose items like pomegranate arils
- Sharp paring knife
- Cutting board
- Paper towels or clean kitchen towel
- Small piping bag or zip top bag for melted chocolate or icing
- Toothpicks or small skewers for detail work and mini kebabs
Quick Tips & substitutions
- Pat fruit dry before arranging so it does not slide around the platter.
- Toss apple slices and banana chunks in lemon juice or orange juice to slow browning.
- Use dairy free chocolate chips and skip candy eyeballs with gelatin to keep the platter vegan.
- Swap any fruit you dislike with similar colors, like mango for pineapple or raspberries for strawberries.
- Keep grapes on small clusters so guests can grab them easily without chasing loose grapes.
- Use parchment paper on a wooden board to protect it from fruit stains.
- Prep faces and decorations on a few “hero” pieces of fruit, then fill the rest of the platter with simple slices.
- Build the platter close to serving time so banana ghosts and apple mouths stay fresh.
How to Make Halloween Fruit Platter Idea
Step 1: Wash, dry, and prep the fruit
Rinse all fruit under cool water and dry it well with towels. Remove stems from strawberries and grapes, peel mandarins, and slice kiwi, apples, and bananas. Keep fruit in separate piles so you can grab what you need quickly.
Step 2: Shape the Halloween “characters”
Slice bananas into 2 to 3 inch chunks and stand them upright as ghosts. Press mini chocolate chips into each banana for eyes and a mouth, or dot on melted chocolate with a toothpick. Peel mandarins, then push a small celery stick or pretzel piece into the top to form tiny pumpkins.
Cut kiwi into thick rounds and add chocolate chip eyes and silly mouths with melted chocolate or icing. Use pineapple slices to cut triangles for monster teeth or jagged “claws.” If you use apples, slice them into wedges and sandwich peanut butter or sunflower seed butter between two slices with a row of mini marshmallows or sliced almonds as “teeth.”
Step 3: Plan the layout
Set your platter or board on the counter and decide where you want the main characters. Place banana ghosts together in one corner, mandarin pumpkins in another, and kiwi monsters near the center. Think of these as anchor points that guide the eye.
Step 4: Fill in with color blocks
Add clusters of green grapes near the kiwi and pineapple for a bright section. Place red or black grapes near strawberries and pomegranate arils to build a darker, moodier corner. Tuck blueberries into gaps and around the edges to frame the whole platter.
Step 5: Add spooky details
Place candy eyeballs on a few random grapes or strawberries to turn them into surprise monsters. Sprinkle pomegranate arils around the platter as “drips” near teeth or claws. Add shredded coconut in a few spots as cobwebs and tuck pretzel sticks as arms or legs on fruit creatures.
Step 6: Check balance and adjust
Step back and look at the platter from above. Shift fruit so you see a mix of orange, green, red, and dark purple across the board. Fill any empty spaces with extra grapes, berries, or mandarin segments so the platter looks full and generous.
Step 7: Chill until serving
Cover the platter loosely with plastic wrap or a large clean towel. Chill it in the fridge until party time, up to 2 hours. Add any last minute details like extra candy eyes or fresh mint leaves right before you serve.
Recipe Variations
-
Gluten free
- Use only fruit, chocolate, and gluten free candy eyeballs.
- Skip pretzel sticks or pick a certified gluten free brand.
-
Vegan
- Use dairy free chocolate chips and vegan icing.
- Avoid marshmallows with gelatin and choose vegan marshmallows instead.
-
Low carb
- Focus on berries, kiwi, and small amounts of melon.
- Skip pineapple, banana, and pomegranate or keep them as tiny accents.
-
Nut free
- Use sunflower seed butter or cream cheese for apple mouths instead of peanut butter.
- Skip almond “teeth” and use mini chocolate chips or pumpkin seeds.
-
Extra fun add ins
- Add melon balls on skewers as “monster eyeball skewers.”
- Use star or bat shaped cookie cutters on melon or pineapple slices.
Ways to Serve Halloween Fruit Platter Idea
- Set the platter in the center of the snack table as a bright, spooky centerpiece.
- Pair it with a yogurt dip or vanilla Greek yogurt in a small bowl with chocolate “spider legs” drawn on the side.
- Pack smaller versions in lunch boxes for a Halloween week surprise.
- Serve it at a classroom party as the “healthy” tray that still feels fun.
- Offer it as a light dessert after a heavier Halloween dinner.
Storage Success
Store leftover fruit in airtight containers in the fridge and keep different fruits in separate containers so strong flavors do not mingle. Eat banana ghosts and apple mouths the same day, since they soften and brown faster. Grapes, berries, mandarins, and pineapple keep well for 2 to 3 days and still taste great in lunch boxes or smoothies. If the platter sits out for a while at a party, move leftovers to the fridge within 2 hours to keep everything fresh and safe.