
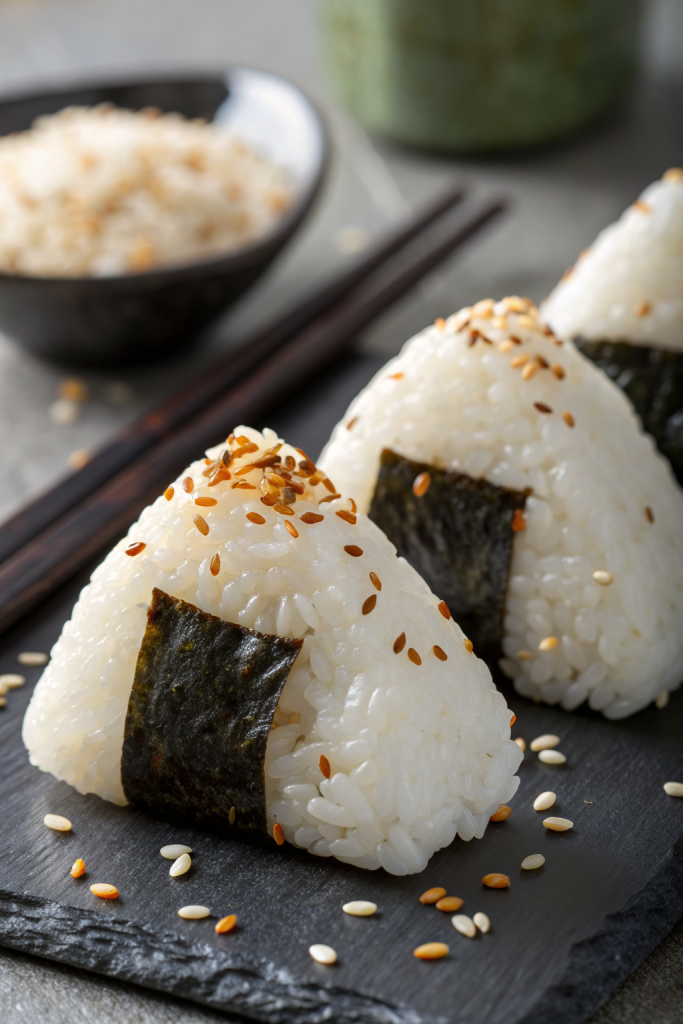
How to Make Tuna Mayo Onigiri Recipe tastes creamy, salty, and a little bit tangy, wrapped in warm rice that feels like a portable hug. It works perfectly for busy folks who want a quick lunch, snack, or kid-friendly meal in under 40 minutes. I started packing these in my own work lunches years ago, and they still beat any sad desk salad.
Why Make This How to Make Tuna Mayo Onigiri Recipe at Home
Homemade tuna mayo onigiri tastes fresher, holds better texture, and costs a fraction of store bought versions. You control the seasoning, the quality of tuna, and how generous you feel with the filling.
You also shape them exactly how you like them, from tiny snack triangles to big, two-bite rice bombs. Kids love them, adults inhale them, and they travel well in lunch boxes or picnic baskets.
“This How to Make Tuna Mayo Onigiri Recipe gave me convenience store nostalgia but tasted way better and felt more filling. ★★★★★”
Ingredients You Need
You can keep this How to Make Tuna Mayo Onigiri Recipe very simple, or you can dress it up a bit. I will list the basics first, then mention easy upgrades and swaps.
Rice
- 2 cups uncooked Japanese short grain rice
- Look for labels like "sushi rice" or "Calrose" if you shop in the US.
- Short grain rice gives that sticky, slightly chewy texture that holds its shape.
- 2 1/4 cups water, plus a splash more if your rice runs a bit dry
- 1/2 teaspoon fine sea salt, or to taste
Tuna Mayo Filling
- 1 can tuna in oil or water (5 to 6 ounces), well drained
- Tuna in oil gives richer flavor and softer texture.
- Tuna in water works fine if you want a lighter version.
- 2 1/2 to 3 tablespoons Japanese mayonnaise
- Kewpie mayo gives the classic flavor and extra creaminess.
- Use regular mayo if that is what you have, and add a tiny pinch of sugar to mimic Kewpie.
- 1 to 2 teaspoons soy sauce, to taste
- 1 teaspoon rice vinegar or lemon juice
- 1 to 2 teaspoons finely chopped green onion or chives (optional but tasty)
- 1/2 teaspoon toasted sesame oil (optional, but it adds great aroma)
- Freshly ground black pepper, to taste
Nori and Seasonings
- 2 to 3 sheets nori (roasted seaweed), cut into strips or rectangles
- Use pre-cut onigiri nori if you find it, or just snip full sheets with scissors.
- Extra salt for your hands and the rice surface
- Optional rice seasonings:
- 1 to 2 teaspoons furikake
- Toasted sesame seeds
- Tiny pinch of sugar if you like a slightly sweet rice edge
Pantry Shortcuts & Substitutions
- Use microwaveable Japanese rice packs if you feel short on time. Just avoid long grain rice, since it does not stick well.
- Use canned salmon instead of tuna if that sits in your pantry.
- Swap soy sauce with tamari or coconut aminos if you avoid gluten.
- Use vegan mayo and mashed chickpeas for a plant based twist.
Equipment List
You do not need fancy tools for this How to Make Tuna Mayo Onigiri Recipe, but a few items help a lot.
- Rice cooker or a medium pot with a lid
- Fine mesh strainer to rinse rice
- Mixing bowl for tuna filling
- Rice paddle or silicone spatula
- Small bowl of water and a pinch of salt for shaping
- Optional onigiri mold if you prefer uniform shapes
- Kitchen scissors to cut nori
Tips & Mistakes
- Rinse the rice until the water runs almost clear, or the rice turns gummy and clumpy.
- Let the rice rest covered for 10 minutes after cooking, or the texture turns uneven.
- Season the rice while it stays warm, or the salt does not distribute well.
- Keep your hands slightly wet and lightly salted, or the rice sticks like glue and the flavor falls flat.
- Do not overfill the center with tuna mayo, or the onigiri split open when you press them.
- Press the rice firmly but gently; crush it too hard and you get dense rice bricks, handle it too softly and it falls apart.
- Cool the rice to warm room temperature before shaping, or you burn your hands and rush the process.
- Add the nori just before serving if you want it crisp; wrap it early if you prefer a softer, chewy nori.
- Use good quality tuna and mayo, because the filling carries most of the flavor.
- Pack them in a lunch box with an ice pack, or the mayo sits in the danger zone too long.
How to Make How to Make Tuna Mayo Onigiri Recipe
Step 1: Cook the Rice
Measure the rice, place it in a bowl, and rinse under cold water while you gently swirl it with your hand. Drain and repeat until the water looks mostly clear. This step removes excess starch and keeps the rice pleasantly sticky instead of gluey.
Transfer the rinsed rice to a rice cooker or pot, add the water, and let it soak for 20 to 30 minutes. This soak gives the grains time to hydrate and cook evenly. Cook the rice according to your rice cooker instructions, or bring the pot to a simmer, cover, lower the heat, and cook for about 12 to 15 minutes until the water absorbs.
Turn off the heat and let the rice sit covered for another 10 minutes. This rest period lets the steam finish the cooking and keeps the grains tender. Fluff the rice gently with a rice paddle or spatula.
Step 2: Season the Rice
While the rice still feels warm, sprinkle in the salt and any optional furikake or sesame seeds. Use a slicing and folding motion with the paddle so you do not mash the grains. Taste and adjust the salt until the rice tastes lightly seasoned on its own.
Spread the rice gently in the pot or a wide bowl so it cools to warm room temperature. You want it warm enough to stick, but not so hot that it hurts to touch. Cover it with a clean towel to keep it from drying out while you mix the filling.
Step 3: Mix the Tuna Mayo Filling
Drain the tuna very well and place it in a mixing bowl. Break it up with a fork so no big chunks remain. Add the mayonnaise, soy sauce, rice vinegar or lemon juice, sesame oil, green onion, and black pepper.
Stir until the mixture looks creamy and cohesive. Taste and adjust with more soy sauce, mayo, or acid until it hits that perfect savory, tangy, creamy balance. The filling should feel moist but not runny, since excess liquid can leak into the rice.
Step 4: Prep Your Shaping Station
Set up a small bowl of clean water and dissolve a pinch of salt in it. This helps season the outside of the rice and keeps it from sticking to your hands. Place your bowl of warm rice, your tuna mayo filling, and your cut nori strips nearby.
If you use an onigiri mold, rinse it lightly and keep it slightly damp. If you shape by hand, keep a clean plate or tray ready for the finished onigiri. Line it with parchment if you worry about sticking.
Step 5: Shape the Onigiri by Hand
Wet your hands lightly with the salted water and rub them together. Scoop about 1/3 to 1/2 cup of warm rice into one hand and flatten it into a thick disc. Make a small indentation in the center with your thumb.
Spoon 1 to 2 teaspoons of tuna mayo filling into the indentation. Bring the rice around the filling and pinch the edges together so the tuna sits fully enclosed. Add a bit more rice on top if you need help sealing it.
Use both hands to gently press the rice into a triangle shape. Rotate and press the corners lightly until you feel a firm but soft triangle. You want it to hold together without squeezing so hard that you crush the grains.
Step 6: Shape with a Mold (Optional)
If you use a mold, lightly wet the inside. Fill it halfway with rice and press a small well in the center. Add a spoonful of tuna mayo, then cover with more rice.
Place the lid on and press down gently but firmly. Release the onigiri onto a plate. Adjust the edges with your hands if needed to tidy up the shape.
Step 7: Add the Nori
Right before serving or packing, wrap each onigiri with a strip or rectangle of nori. Press the nori against the rice so it sticks. You can cover the bottom only, wrap a belt around the middle, or cover almost the whole triangle.
If you like crisp nori, keep it separate and wrap it just before you eat. If you enjoy a softer, more tender nori, wrap it earlier and let it sit with the rice. Both styles taste great, so follow your own preference.
Step 8: Taste and Adjust Seasoning
Take a test bite of one onigiri. If the rice tastes under seasoned, lightly sprinkle a tiny bit of salt on the outside of the rest. If the filling tastes too mild, mix a touch more soy sauce or mayo into the remaining tuna and use that for the next batch.
You can also sprinkle a little furikake on the outside for extra flavor and color. Arrange the finished onigiri on a plate or in a lunch box. Enjoy them slightly warm or at room temperature.
Variations I've Tried
I like to add a tiny bit of sriracha or chili crisp to the tuna mayo for a spicy version. A squeeze of lemon and extra black pepper turns it into a bright, almost tuna salad style filling. Sometimes I mix chopped pickles or Japanese pickled cucumbers into the tuna for crunch.
You can mix furikake straight into the rice before shaping for extra flavor in every bite. Try a half tuna mayo, half avocado mash filling for a richer, creamier center. You can also swap tuna for canned salmon or shredded cooked chicken and keep the same seasoning.
How to Serve How to Make Tuna Mayo Onigiri Recipe
Serve this How to Make Tuna Mayo Onigiri Recipe slightly warm or at room temperature with miso soup, sliced cucumbers, and cherry tomatoes for a simple meal. Pack them in bento boxes with edamame, fruit, and a small salad for a balanced lunch. Kids enjoy them with cut-up veggies and a little soy sauce on the side for dipping.
You can also serve them as a snack platter with different fillings, like tuna mayo, umeboshi, and salmon, so everyone picks their favorite. They work great for road trips, picnics, or busy workdays when you need something easy to eat with one hand.
How to store
- Store leftover tuna mayo onigiri in an airtight container in the fridge for up to 24 hours for best texture and food safety.
- Wrap each onigiri tightly in plastic wrap, then place them in a container so they do not dry out or pick up fridge smells.
- Avoid freezing onigiri with mayo filling, since the texture of both rice and mayo turns unpleasant after thawing.
- Reheat gently in the microwave for 15 to 20 seconds, just until the chill comes off, then add fresh nori so it stays crisp.