
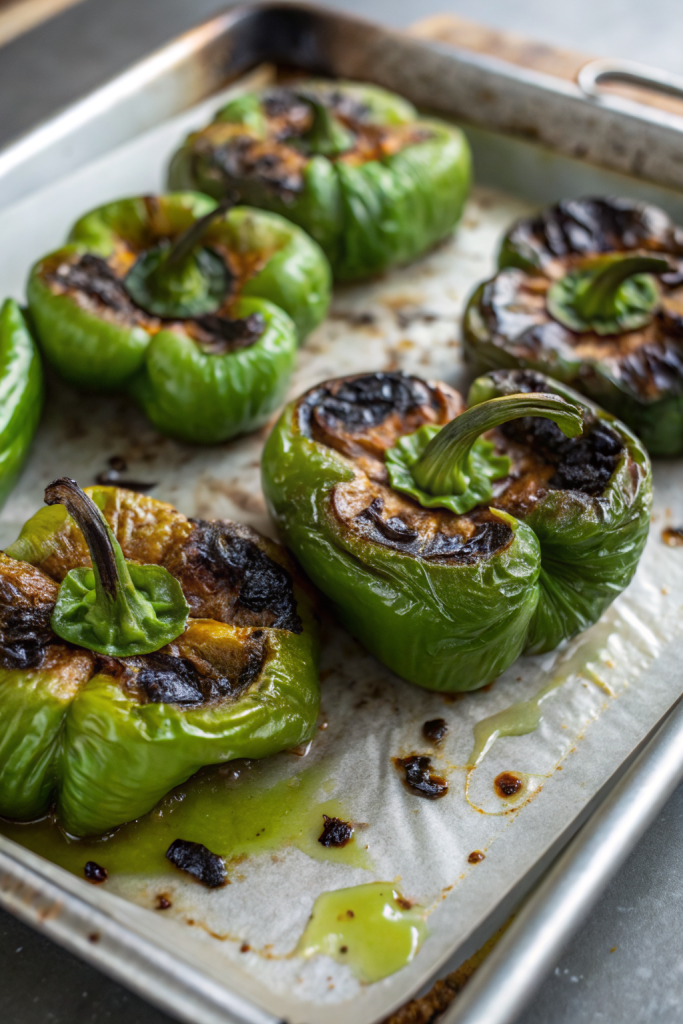
How to Roast Hatch Chile in the Oven gives you smoky, slightly sweet heat with a soft, juicy bite that tastes like late summer in New Mexico. It works perfectly for busy home cooks who want big flavor in about 30 to 40 minutes, start to finish. I first learned this method after hauling ten pounds of Hatch chiles home in my suitcase, and my kitchen still smells like that trip every August.
Why Make This Roast Hatch Chile in the Oven at Home
Roasting Hatch chile in the oven lets you control the char, the heat level, and the salt instead of relying on store bought jars. You skip mystery ingredients and keep all that fresh, roasted flavor for sauces, stews, burgers, and breakfast eggs.
You also avoid standing outside over a grill in blazing heat. The oven does the heavy lifting while you line trays, flip peppers, and feel very accomplished with minimal effort.
This How to Roast Hatch Chile in the Oven method gave me smoky, peelable chiles with perfect heat and zero fuss, better than any store roasted batch I ever bought. ★★★★★
Ingredients You Need
Hatch chiles
- Fresh Hatch chiles
- Choose firm, glossy peppers with tight skin and no soft spots.
- Mild, medium, and hot all work; pick based on your heat tolerance.
- If you cannot find Hatch, use Anaheim or poblano as a backup, but expect slightly different flavor.
Oil and seasoning
- Neutral oil, optional
- Use avocado, canola, or grapeseed oil if you want slightly softer, richer chiles.
- Skip the oil if you want a drier roast and easier blackening of the skin.
- Kosher salt, optional
- I usually salt after roasting so I can taste and adjust.
- Use a light hand if you plan to add the chiles to salty dishes like chili or tacos.
Optional add ons
- Lime wedges for serving
- Garlic powder or onion powder if you plan to blend the roasted chiles into sauce
- A splash of broth if you want to turn them into a quick green sauce later
Equipment
- Large rimmed baking sheet
- Heavy duty aluminum foil or parchment paper
- Oven safe cooling rack that fits inside the sheet pan, optional but helpful
- Tongs
- Large bowl
- Plastic wrap or a tight fitting lid for the bowl
- Cutting board and sharp knife
- Disposable gloves if you use hot Hatch chiles and want to protect your hands
Tips & Mistakes
- Preheat the oven fully so the skin blisters fast and the flesh does not dry out.
- Line the pan with foil to catch juices and make cleanup easier.
- Space the chiles in a single layer so they roast instead of steam.
- Flip the chiles halfway so both sides blister and char evenly.
- Roast until the skin looks blistered and black in spots, not until the flesh shrivels.
- Move the chiles straight into a covered bowl so the steam loosens the skins.
- Peel the chiles after they cool so you avoid burning your fingers and tearing the flesh.
- Wear gloves if you use hot Hatch chiles and avoid touching your eyes.
- Pull out seeds and ribs if you want milder heat; leave some in if you like it spicy.
- Chill roasted chiles quickly before freezing so they keep better texture and color.
How to Roast Hatch Chile in the Oven
Step 1: Prep the chiles and pan
Rinse the Hatch chiles under cool water and pat them dry very well. Dry skin blisters better than damp skin. Trim any long stems if they prevent the chiles from lying flat, but keep enough stem to grab with tongs.
Line a rimmed baking sheet with heavy duty foil or parchment. If you have an oven safe rack, set it inside the pan so heat can circulate under the chiles. Arrange the chiles in a single layer with a little space between each one.
Step 2: Heat the oven
Set your oven to broil on high and move an oven rack to the upper third position. I usually keep the rack about 5 to 6 inches from the broiler element. Let the oven heat for at least 10 minutes so the broiler runs hot and steady.
Step 3: Roast the first side
Slide the tray of Hatch chiles under the broiler. Roast 5 to 8 minutes until the tops blister, bubble, and char in spots. Rotate the pan once if your broiler heats unevenly.
Watch closely near the end of this time so the skins darken without burning to ash. Some black spots count as perfect flavor. You want blistered skin and tender flesh that still holds its shape.
Step 4: Flip and roast the second side
Use tongs to flip each chile. Roast another 4 to 7 minutes until the second side blisters and chars like the first. If some chiles finish faster, pull them off the tray and keep roasting the rest.
You want the skins mostly blistered all around with patches of black. The chiles should feel soft when you squeeze them gently with tongs. If they still feel firm, give them another minute or two.
Step 5: Steam the chiles
Transfer the hot roasted Hatch chiles to a large bowl. Cover the bowl tightly with plastic wrap or a lid. Let the chiles steam for 10 to 15 minutes.
The trapped steam loosens the skins so they peel off easily. Do not skip this step if you want smooth, clean roasted chile flesh. Use this time to tidy the counter or toast tortillas.
Step 6: Peel and seed
After the chiles cool enough to handle, pull off the skins with your fingers. The skin should slide off in big sheets. If small bits stick, scrape them gently with the back of a knife.
Slice each chile open lengthwise on a cutting board. Use your fingers or a spoon to scrape out seeds and white ribs if you want milder heat. Pat the roasted flesh dry with a paper towel if it feels very wet and you plan to chop it for salsa.
Step 7: Use or store
Use the roasted Hatch chiles right away in recipes, or portion them for later. I like to chop some for eggs and tacos and leave some in strips for burgers and sandwiches. Cool any chiles you plan to store to room temperature before you pack them.
Variations I’ve Tried
I sometimes brush the chiles lightly with avocado oil before roasting, which gives a slightly richer flavor and softer texture. I also tried sprinkling a tiny pinch of kosher salt and garlic powder on the peeled chiles, then packing them in small jars with a spoonful of their own juices.
You can roast mixed heat levels on one tray and label them after peeling, so you keep mild, medium, and hot batches separate. I also like to roast a tray of Hatch chiles alongside a few tomatillos, then blend everything into a quick green sauce for enchiladas or burrito bowls.
How to Serve Roast Hatch Chile
Use roasted Hatch chile in breakfast burritos, scrambled eggs, or on top of avocado toast for a smoky kick. Stir chopped chiles into mac and cheese, quesadillas, or grilled chicken for easy flavor. Blend them with tomatillos, garlic, and a little broth for a quick green chile sauce.
You can also layer strips of roasted Hatch chile on burgers, turkey sandwiches, or veggie sandwiches with cheese. Add them to soups, stews, and chili when you want depth without a long simmer.
How to store
- Fridge: Cool roasted, peeled Hatch chiles completely, then store in an airtight container up to 5 days.
- Freezer whole or in strips: Lay chiles on a parchment lined tray, freeze solid, then move to freezer bags; keep up to 6 months.
- Freezer chopped: Chop cooled chiles, portion into small freezer bags or silicone trays, and freeze up to 6 months.
- Reheating: Thaw overnight in the fridge or under cool running water, then warm gently in a skillet over low heat or stir straight into hot dishes so they heat through without turning mushy.
How to Roast Hatch Chile in the Oven
Ingredients
Instructions
- Rinse the Hatch chiles under cool water and pat them very dry so the skins blister well. Trim any very long stems if needed, leaving enough stem to grab with tongs.
- Line a rimmed baking sheet with heavy-duty foil or parchment. If you have an oven-safe rack, set it inside the pan and arrange the chiles in a single layer with a little space between each one.
- Set your oven to broil on high and move a rack to the upper third of the oven, about 5 to 6 inches from the broiler. Let the oven preheat for at least 10 minutes so the broiler is very hot.
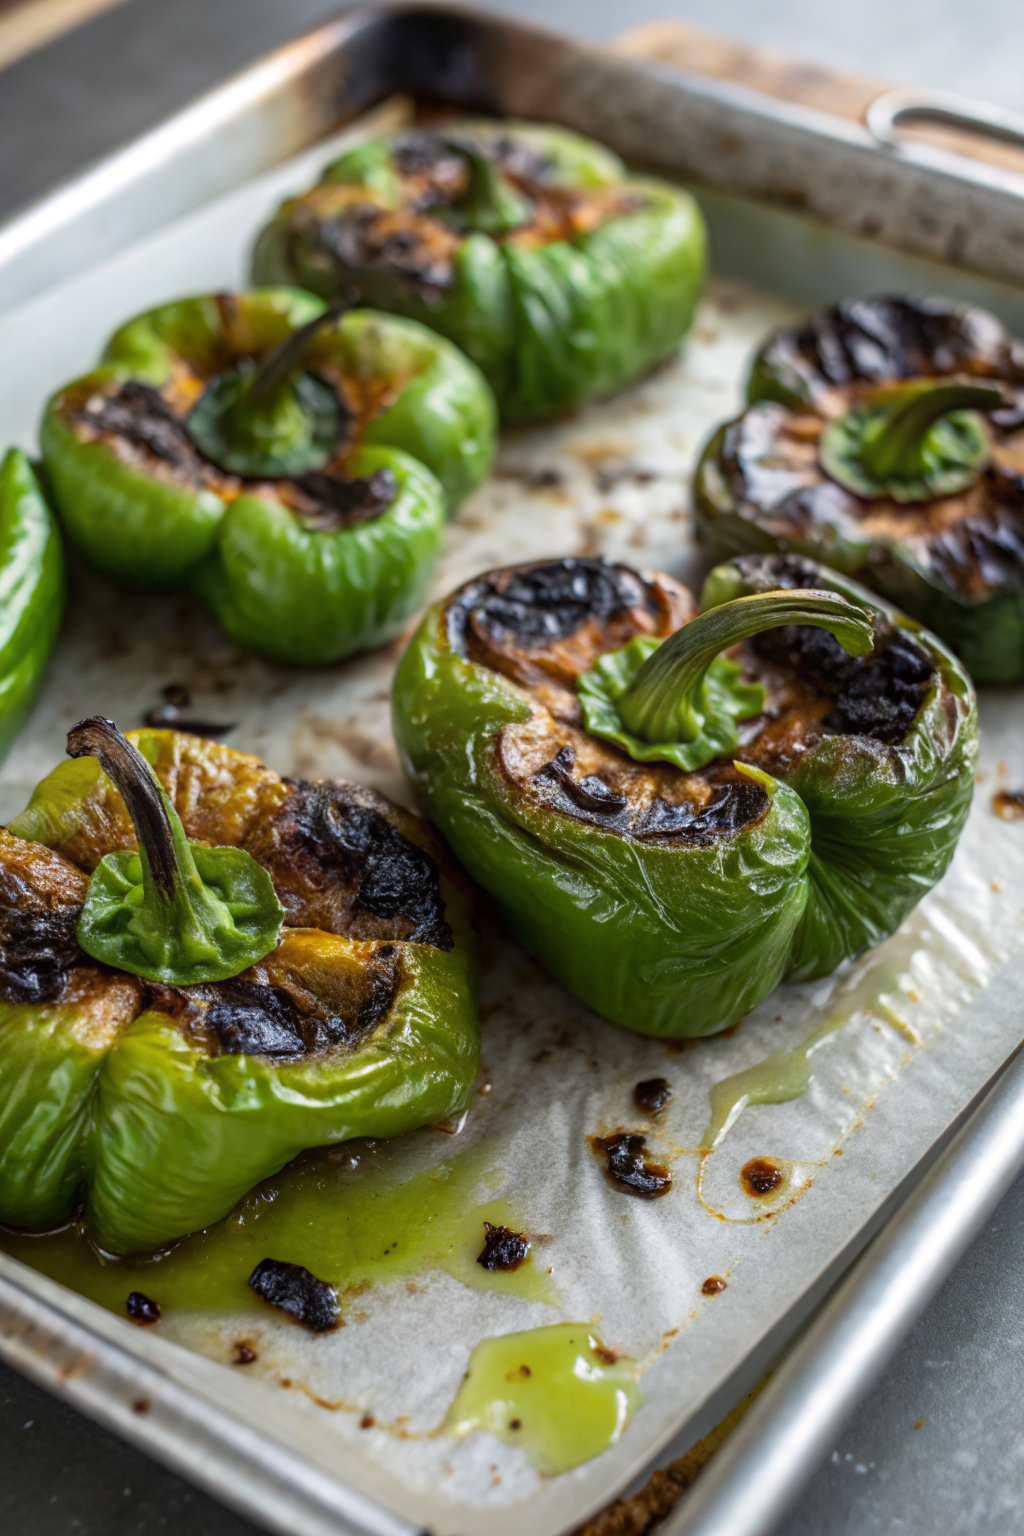
- Slide the tray of chiles under the broiler. Roast for 5 to 8 minutes, until the tops blister, bubble, and char in spots, rotating the pan once if your broiler heats unevenly.
- Use tongs to flip each chile. Roast the second side for another 4 to 7 minutes, until the skins are mostly blistered with patches of black and the chiles feel soft but still hold their shape. Remove any chiles that finish early and keep roasting the rest if needed.
- Transfer the hot roasted chiles to a large bowl and cover tightly with plastic wrap or a lid. Let them steam for 10 to 15 minutes to loosen the skins.
- When the chiles are cool enough to handle, peel off the skins with your fingers, scraping any stubborn bits gently with the back of a knife. Slice each chile open lengthwise and scrape out the seeds and white ribs if you want milder heat.
- Use the roasted chiles right away in recipes, or cool them to room temperature before storing. Leave some in strips for burgers and sandwiches and chop some for eggs, tacos, salsas, or sauces.
Leave a Reply