

How to Freeze Corn on The Cob tastes sweet, crisp, and sunny even in the middle of winter, and it works perfectly for busy cooks who want peak-summer flavor in under 10 minutes of effort. You can blanch and freeze a big batch in under an hour, then enjoy it for months. I grew up in the Midwest with corn stands on every corner, so I take this job very seriously and slightly personally.
Why Make This Freeze Corn on The Cob at Home
Frozen corn on the cob from your own kitchen tastes brighter, sweeter, and less watery than most store bags. You control the salt, the blanch time, and the texture, so every cob tastes like it just came out of a summer pot.
You also save money when you freeze corn on the cob during peak season, when farmers practically beg you to take a dozen. You stash it in the freezer, then pull it out for soups, chowders, tacos, and quick side dishes all year.
“This method keeps corn so sweet and crisp that my family thought I cooked it fresh from the farm stand ★★★★★”
Ingredients You Need
- Fresh corn on the cob
- Choose ears with bright green husks that hug the cob tightly.
- Look for moist, slightly sticky silk and plump kernels that feel full when you press gently.
- Yellow, white, or bicolor all work, so follow your taste or what your market sells.
- Salt
- Use kosher salt or fine sea salt for blanching water.
- Avoid iodized salt if you notice a slightly metallic taste.
- Ice
- You need plenty of ice to shock the corn after blanching.
- Bagged ice works great if your freezer ice maker runs slow.
- Water
- Use enough water so the corn moves freely in the pot.
- Hot water from the tap helps the pot reach a boil faster.
Optional flavor add-ins for serving later
These do not go in before freezing, but they pair well when you reheat the corn.
- Butter or ghee
- Garlic powder or fresh minced garlic
- Smoked paprika or chili powder
- Lime juice
- Fresh herbs like cilantro, parsley, or chives
Equipment list
- Large stockpot or Dutch oven
- Large bowl for ice bath
- Tongs
- Sharp chef’s knife or serrated knife
- Cutting board
- Clean kitchen towels or paper towels
- Baking sheet
- Parchment paper or silicone mat
- Freezer bags or airtight freezer containers
- Permanent marker for labeling
Tips & Mistakes
- Cool the corn completely before freezing so you avoid icy crystals and soggy texture.
- Blanch the corn briefly so you keep the fresh flavor and stop enzymes that cause loss of sweetness.
- Dry the cobs well before freezing so they do not stick together in a giant frosty log.
- Label every bag with date and quantity so you avoid mystery vegetables at the back of the freezer.
- Use heavy duty freezer bags so the corn does not pick up freezer odors.
- Avoid overcooking during blanching or reheating, since long cooking gives you tough, chewy kernels.
- Keep the pot roomy and avoid crowding the ears so the water returns to a boil quickly.
- Skip salting the corn directly before freezing, because salt can toughen kernels during storage.
- Freeze in portions that match your usual meals so you only thaw what you need.
- Lay the cobs in a single layer on a tray when you freeze so they do not freeze into a clump.
How to Freeze Corn on The Cob
Step 1: Husk and clean the corn
Peel back the husks and remove them along with as much silk as you can. Rub the cob with your hands or a soft vegetable brush to pull off stubborn silk. Trim the stem end if it looks rough or dirty.
Step 2: Boil water and prepare an ice bath
Fill a large pot with water and bring it to a rolling boil over high heat. Add a tablespoon or two of salt to season the blanching water. While the water heats, fill a large bowl with cold water and plenty of ice so you have a strong ice bath.
Step 3: Blanch the corn
Carefully lower the corn into the boiling water with tongs. Start timing once the water returns to a boil. Blanch small ears for 4 minutes, medium ears for 5 minutes, and large ears for 6 minutes so the kernels heat through but stay crisp.
Step 4: Shock the corn in ice water
Lift the corn out of the boiling water and move it straight into the ice bath. Fully submerge each cob so the cold water cools it quickly. Keep the corn in the ice bath until it feels completely cold, usually 5 to 7 minutes.
Step 5: Dry the corn thoroughly
Transfer the cooled corn to a clean kitchen towel or paper towels. Pat each cob dry on all sides so you remove surface moisture. Let the corn air dry for a few extra minutes while you line a baking sheet with parchment.
Step 6: Choose whole cobs or kernels
Decide whether you want to freeze whole corn on the cob or cut kernels. Whole cobs work well for grilling and simple side dishes. Kernels work better for soups, casseroles, and recipes that need loose corn.
To freeze whole corn on the cob
Lay the dried ears in a single layer on the parchment lined baking sheet. Space them slightly so air can move around each cob. Place the tray in the freezer and freeze until the cobs feel solid, about 2 to 3 hours.
To freeze corn kernels
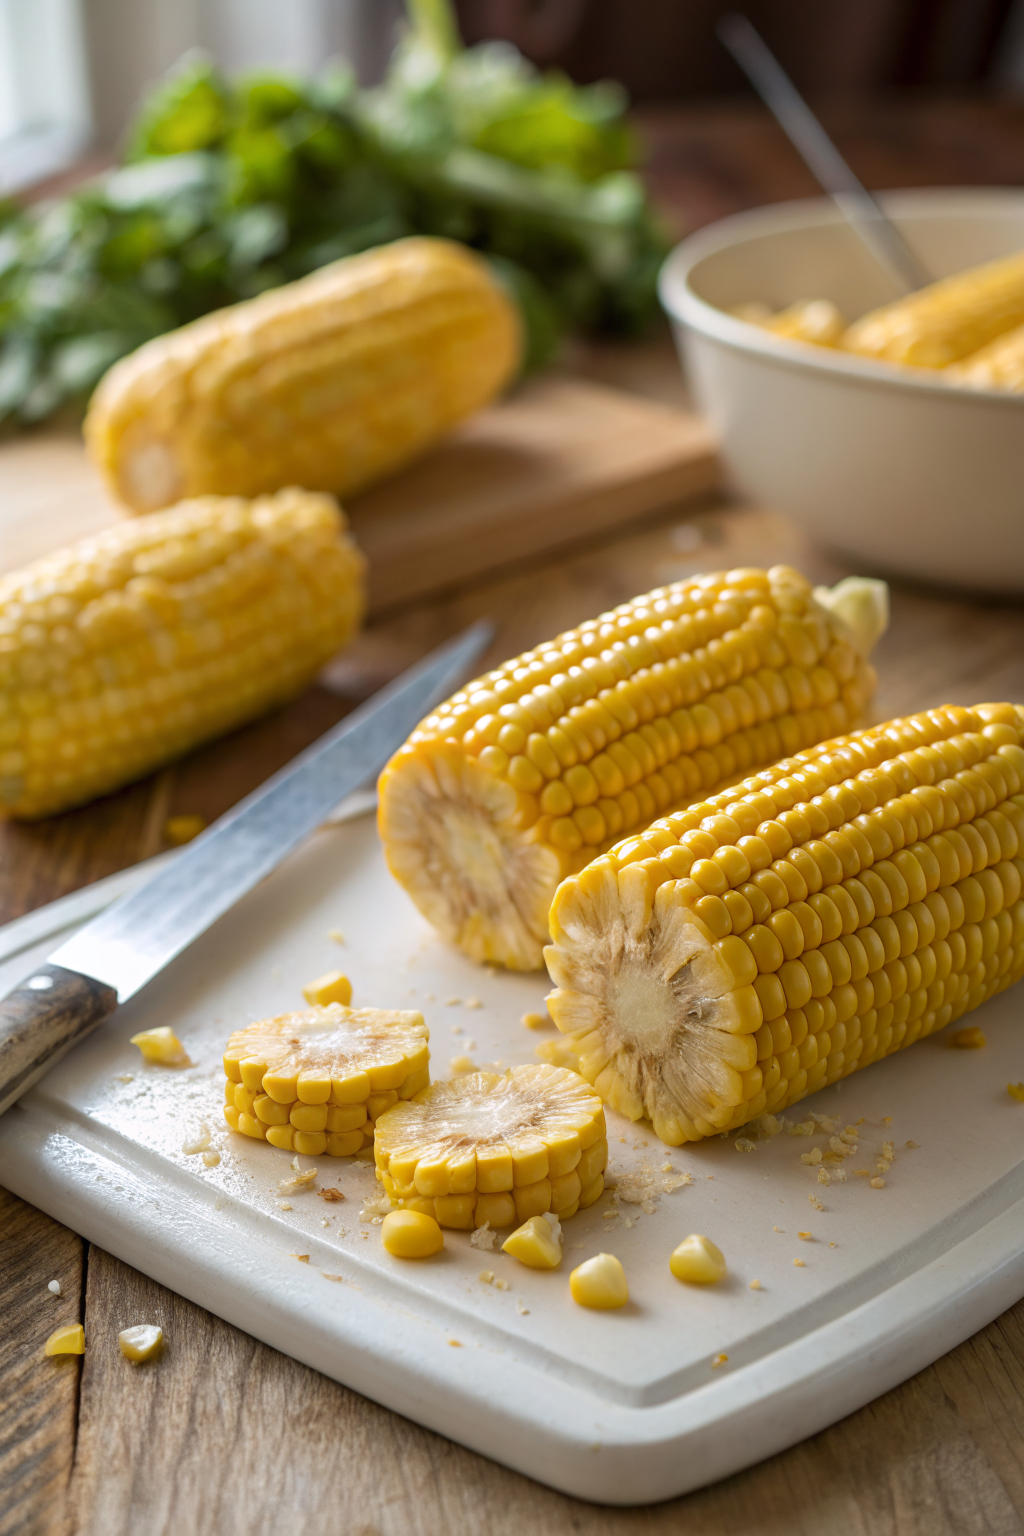
Stand a cob upright on a cutting board and hold the top firmly. Slice downward with a sharp knife, close to the cob, to cut off the kernels. Rotate the cob and repeat until you remove all the kernels, then spread them in a single layer on a parchment lined baking sheet and freeze until solid.
Step 7: Pack and label
Once the corn or kernels feel frozen solid, move them into freezer bags or airtight containers. Press out as much air as you can from bags before sealing. Label each bag with the date, type, and quantity, such as “Corn on the cob, 4 ears, August.”
Step 8: Freeze and use
Stack the bags flat in the coldest part of your freezer. Keep them away from the door so they do not experience temperature swings. Use your frozen corn on the cob within 8 to 12 months for best flavor and texture.
Variations I’ve Tried
I sometimes skip the blanching step when I feel lazy and freeze raw kernels, and they still taste good in quick sautés and tacos, though they lose sweetness a bit faster. I also like to blanch with a small spoon of sugar in the water when the corn tastes slightly starchy, since that boosts the sweetness. When I plan to grill later, I freeze the cobs slightly under blanched so they finish cooking on the grill and keep a snappy bite.
I also cut some kernels off and freeze them with a few strips of roasted poblano or jalapeño in the same bag for instant corn salsa. Another favorite move uses a mix of white and yellow corn in one bag, which looks pretty in chowders and salads. You can also freeze smaller half cobs for kids or for recipes that need smaller portions.
How to Serve
You can boil frozen corn on the cob straight from the freezer in salted water for 4 to 6 minutes until hot and tender. Brush it with melted butter, sprinkle with salt, pepper, and maybe a little chili powder, then squeeze fresh lime over the top. Cut the kernels off and toss them into salads, quesadillas, burrito bowls, or quick weeknight soups.
You can also sauté frozen kernels in a skillet with a little oil, garlic, and onions for a fast side dish. Add them to cornbread batter, casseroles, or breakfast hash with potatoes and eggs. Kids usually love it plain with a little butter and a pinch of salt.
How to store
- In the fridge
- Keep blanched, cooled corn in an airtight container for up to 3 days before freezing if you feel short on time.
- Store thawed cooked corn in the fridge for 3 to 4 days and reheat gently.
- In the freezer
- Store frozen corn on the cob or kernels in heavy duty freezer bags for 8 to 12 months.
- Keep the bags flat and stacked in the coldest section of the freezer, away from the door.
- Best reheating method
- Boil frozen cobs in salted water for 4 to 6 minutes until hot, then season.
- Microwave kernels in a covered dish with a splash of water for 2 to 3 minutes, stirring halfway.
- Sauté kernels in a skillet with a little oil or butter over medium heat until hot and slightly caramelized.
How to Freeze Corn on The Cob
Ingredients
Instructions
- Husk the corn by peeling back and removing the husks and as much silk as possible. Rub the cobs with your hands or a soft vegetable brush to remove stubborn silk, and trim any rough or dirty stem ends.
- Fill a large pot with water and bring it to a rolling boil over high heat. Stir in the salt to season the blanching water. While the water heats, fill a large bowl with cold water and plenty of ice to create an ice bath.
- Carefully lower the cleaned corn into the boiling water. Once the water returns to a boil, blanch small ears for 4 minutes, medium ears for 5 minutes, and large ears for 6 minutes, just until the kernels are heated through but still crisp.
- Using tongs, transfer the blanched corn directly into the prepared ice bath. Submerge each cob completely and cool until the corn feels fully cold, about 5 to 7 minutes.
- Remove the cooled cobs from the ice bath and place them on clean kitchen towels or paper towels. Pat the corn dry on all sides to remove surface moisture, then let it air-dry for a few extra minutes.
- Decide whether to freeze whole cobs or kernels. For whole cobs, line a baking sheet with parchment paper, arrange the dried ears in a single layer with a little space between them, and freeze until solid, about 2 to 3 hours.
- For kernels, stand a cob upright on a cutting board and hold the top firmly. Slice downward with a sharp knife close to the cob to remove the kernels, rotating until all kernels are cut off. Spread the kernels in a single layer on a parchment-lined baking sheet and freeze until solid.
- Once the cobs or kernels are frozen solid, transfer them to freezer bags or airtight freezer containers. Press out as much air as possible before sealing. Label each bag with the date, type (whole cobs or kernels), and quantity.
- Stack the bags flat in the coldest part of your freezer, away from the door. Use the frozen corn within 8 to 12 months for the best flavor and texture.
Notes
Approximate per 1 ear (about 90 g) blanched corn, no added butter: 80 calories; fat 1 g; saturated fat 0 g; carbohydrates 19 g; fiber 2 g; sugars 6 g; protein 3 g; sodium 15 mg (from salted blanching water, amount absorbed is small). Values are estimates and will vary based on ear size, variety of corn, and how much salt is used in the blanching water.
Leave a Reply