
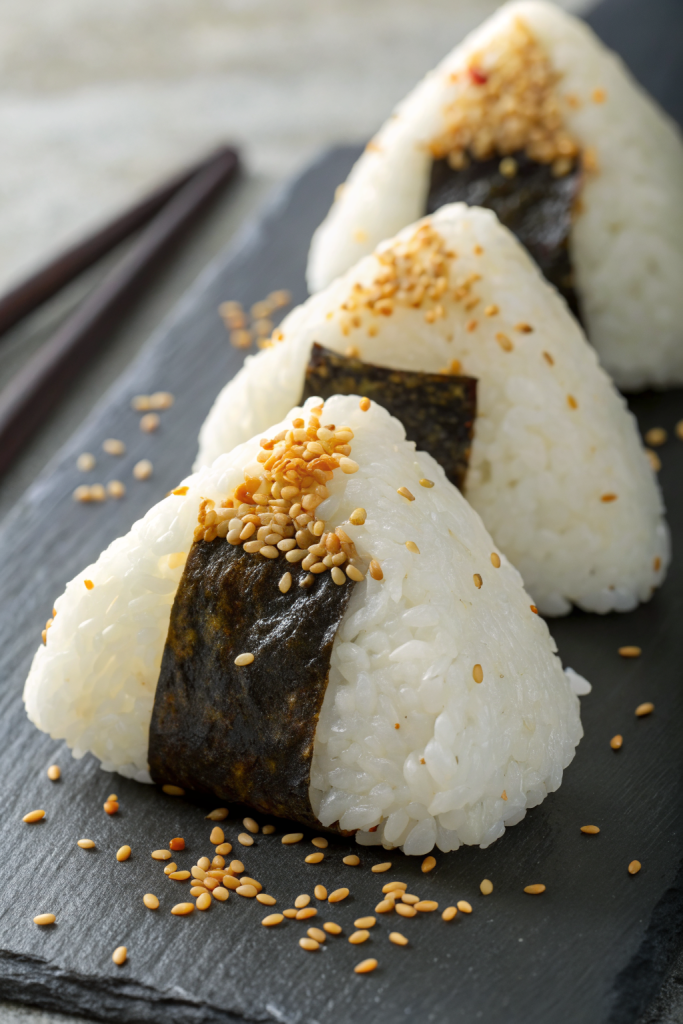
How to Make Tuna Mayo Onigiri Recipe tastes like a cozy sushi roll that you can hold in one hand, with creamy, savory tuna tucked inside warm, lightly salted rice. It works perfectly for busy people who want a quick lunch, snack, or meal prep option in about 35 minutes total. I started packing these in my own lunch years ago, and they still beat any sad desk salad I ever ate.
Why Make This Tuna Mayo Onigiri Recipe at Home
Homemade tuna mayo onigiri tastes fresher, costs less, and lets you control the seasoning and quality of the tuna and mayo. You also shape the rice to your favorite size, which helps if you pack lunches for kids or want a bigger, satisfying snack.
You also skip mystery fillings and soggy convenience store rice. When you cook the rice correctly and season it well, the onigiri hold their shape, stay tender, and taste great even at room temperature.
Tastes just like a Japanese convenience store onigiri, but fresher, creamier, and way more satisfying ★★★★★
Ingredients You Need
For the rice:
- 2 cups Japanese short grain rice (sushi rice works best; avoid long grain because it does not stick well)
- 2 cups water for cooking rice, plus rinsing water
- 1 teaspoon fine sea salt
- Optional: 1 tablespoon rice vinegar and 1 teaspoon sugar for a slightly seasoned rice flavor
For the tuna mayo filling:
- 1 can tuna in oil, drained well
- Use tuna in water if you prefer a lighter taste, but tuna in oil gives richer flavor.
- 3 to 4 tablespoons Japanese mayonnaise (Kewpie gives the most authentic flavor, but regular mayo works in a pinch)
- 1 to 2 teaspoons soy sauce, to taste
- 1 teaspoon rice vinegar or lemon juice for brightness
- 1 teaspoon sugar, optional, for a slight sweetness like convenience store onigiri
- 1 to 2 teaspoons finely chopped green onion or chives, optional
- Freshly ground black pepper, to taste
For shaping and wrapping:
- 1 teaspoon fine sea salt for your hands while shaping
- 1 to 2 tablespoons water in a small bowl for wetting your hands
- 3 to 4 sheets nori, cut into strips or rectangles
- Use roasted nori for sushi; seasoned nori works too but tastes slightly sweeter.
Optional mix ins and toppings:
- Toasted sesame seeds
- Furikake rice seasoning
- Shichimi togarashi for a spicy kick
- Small strips of cucumber or avocado for extra texture
Equipment:
- Rice cooker or a medium pot with lid
- Fine mesh strainer for rinsing rice
- Medium bowl for tuna mixture
- Rice paddle or silicone spatula
- Clean kitchen towel
- Plastic wrap or onigiri mold if you prefer not to shape by hand
- Kitchen scissors for cutting nori
Tips & Mistakes
- Rinse the rice until the water runs almost clear to avoid gummy, heavy rice.
- Use Japanese short grain rice, not jasmine or basmati, because you need stickiness for proper onigiri.
- Let the rice rest covered for 10 minutes after cooking so the texture evens out.
- Season the rice while it stays warm, not hot, so you avoid mushy grains.
- Cool the rice until warm to the touch before shaping so you avoid burning your hands and squashing the grains.
- Wet and lightly salt your hands before shaping to prevent sticking and to season the outer layer.
- Do not overfill the center or the onigiri will crack and leak tuna.
- Press the rice gently but firmly so the triangle holds together without turning into a dense brick.
- Keep the tuna mixture fairly thick; drain tuna well so the filling does not soak the rice.
- Wrap nori right before eating if you want it crisp; wrap earlier if you like it soft and chewy.
- Pack onigiri tightly in a container so they do not roll around and break during transport.
- Avoid leaving tuna mayo onigiri at room temperature for more than 4 hours for food safety.
How to Make Tuna Mayo Onigiri
Step 1: Rinse and cook the rice
Measure the rice into a fine mesh strainer and rinse under cold water. Swirl the rice with your hand and drain the cloudy water, then repeat until the water looks mostly clear. Let the rice drain for 10 to 15 minutes so extra water drips off.
Add the rice and measured water to a rice cooker or pot. Cook according to rice cooker instructions, or bring to a boil on the stove, then lower to a gentle simmer, cover, and cook for about 12 to 15 minutes. Turn off the heat and let the rice rest, covered, for 10 minutes.
Step 2: Season and cool the rice
Fluff the cooked rice gently with a rice paddle or silicone spatula. If you use rice vinegar and sugar, mix them in a small bowl until the sugar dissolves, then drizzle over the rice. Sprinkle in the salt and fold the rice with a cutting and lifting motion so you do not crush the grains.
Spread the rice in a wide bowl or shallow dish. Cover loosely with a clean kitchen towel. Let the rice cool until warm but not hot, about 10 to 15 minutes.
Step 3: Mix the tuna mayo filling
Open the tuna can and drain it very well. Press the tuna lightly with the lid or a spoon to squeeze out extra liquid, which keeps the filling thick and not watery. Add the tuna to a medium bowl and break it into small flakes.
Stir in the mayonnaise, soy sauce, rice vinegar or lemon juice, and sugar if you use it. Mix until the tuna looks creamy but still holds its shape; add more mayo if it looks dry. Taste and adjust with more soy sauce, pepper, or a pinch of salt. Fold in chopped green onion or chives if you like a fresh bite.
Step 4: Prep your station
Set out the bowl of warm rice, the tuna filling, a small bowl of water, and a small dish of salt. Cut the nori sheets into strips or rectangles that fit around the base or back of each onigiri. Line a tray or plate with parchment or plastic wrap so the rice does not stick.
If you use an onigiri mold, lightly wet and salt the inside. If you shape by hand, keep a clean kitchen towel nearby to wipe your hands between onigiri. This setup keeps the process smooth and less messy.
Step 5: Shape the onigiri by hand
Wet your hands lightly with water, then rub a pinch of salt between your palms. Scoop about 1⁄3 to 1⁄2 cup of warm rice into one hand and flatten it slightly into a thick disc.
Make a small well in the center with your thumb. Add about 1 to 1½ tablespoons of tuna mayo into the well. Bring the rice around the filling, then add a bit more rice on top if needed so the tuna sits fully covered.
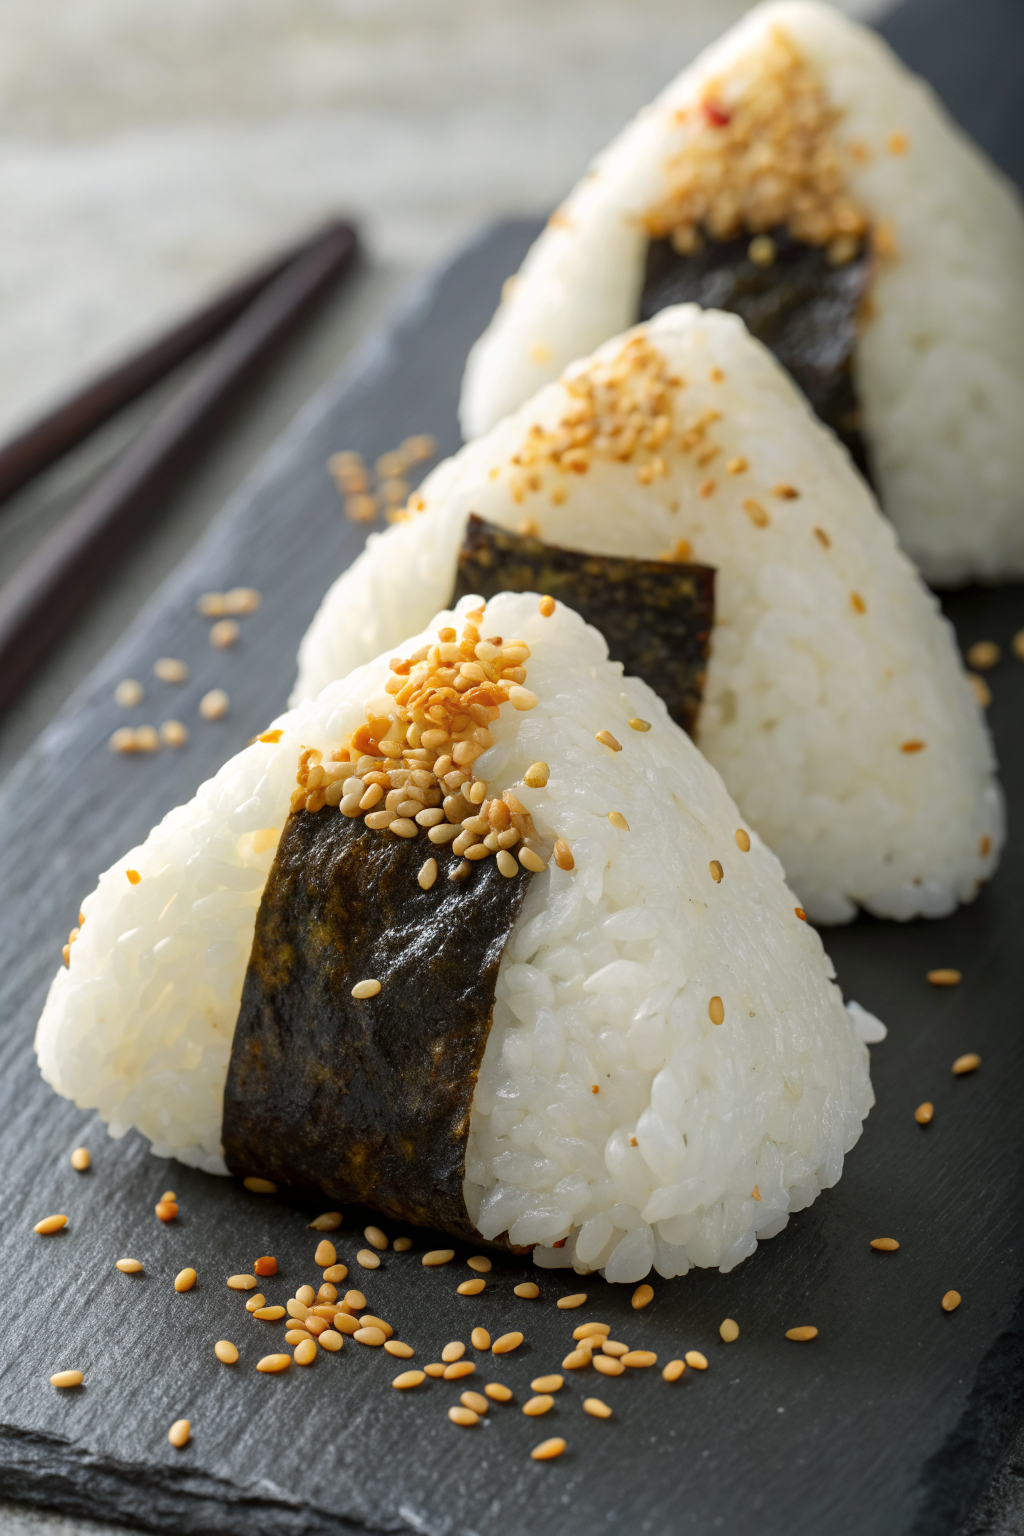
Shape the rice into a triangle by cupping your hands. Use one hand as the base and the other two sides as the triangle corners, then gently press and rotate. Work gently so the rice sticks together but still feels soft and tender.
Step 6: Shape with a mold option
If you prefer a mold, fill the bottom with a thin layer of rice. Add a spoonful of tuna mayo in the center, then cover with more rice. Press the lid down firmly but not too hard, then release the onigiri onto your tray.
Check for cracks or exposed filling and patch with a bit of extra rice. This method helps if you make a big batch or feel nervous about hand shaping. Kids also enjoy pressing the molds like little rice sandcastles.
Step 7: Add the nori
Right before you pack or serve, wrap each onigiri with a strip or rectangle of nori. Press the nori gently against the rice so it sticks. You can cover just the bottom, the back, or wrap it all the way around, depending on your preference.
If you want crisp nori, keep the strips separate and wrap them right before eating. If you like soft nori, wrap them earlier and let the rice moisture soften the seaweed. Both textures taste great, so follow your favorite style.
Step 8: Garnish and pack
Sprinkle toasted sesame seeds or furikake on the outside if you like extra flavor and crunch. Pack the onigiri snugly in a lunch box or container so they do not move around. Add sliced cucumbers, cherry tomatoes, or fruit on the side for a complete meal.
Keep the container in the fridge until you leave, then enjoy within a few hours if you carry it at room temperature. I often wrap each onigiri in plastic wrap for easy grab and go snacks.
Variations I’ve Tried
Spicy tuna mayo onigiri: Mix in sriracha or Japanese chili oil with the mayo and tuna, then add a little extra mayo to keep the filling creamy. This version tastes great with sesame seeds on the outside.
Avocado tuna mayo onigiri: Dice ripe avocado and fold it gently into the tuna mayo right before shaping. The avocado adds richness and a buttery texture that pairs nicely with the rice.
Corn tuna mayo onigiri: Add a few tablespoons of canned or thawed frozen corn to the tuna mixture for sweetness and crunch. Kids usually love this version, and it packs nicely in lunch boxes.
Furikake rice onigiri: Mix furikake directly into the rice before shaping, then fill with plain tuna mayo. This method seasons every bite and looks pretty with colorful flecks in the rice.
How to Serve Tuna Mayo Onigiri
Serve tuna mayo onigiri at room temperature for the best texture, since cold rice feels firm and less pleasant. Pair them with miso soup, a simple cucumber salad, or cut fruit for a balanced meal. Pack them in bento boxes with edamame, carrot sticks, and a hard boiled egg for extra protein. They also work well as a road trip snack or picnic food, since you eat them easily with just your hands.
How to store
- Room temperature: Keep tuna mayo onigiri at room temperature for no longer than 4 hours, and only in a cool environment.
- Fridge: Store wrapped tightly in plastic wrap or an airtight container for up to 2 days; expect the rice to firm up a bit.
- Freezer: Freeze individually wrapped onigiri without nori for up to 1 month; add fresh nori after reheating.
- Reheating: Reheat chilled or frozen onigiri in the microwave, wrapped loosely, for 30 to 60 seconds until just warm, then let them rest for a minute before unwrapping so the moisture redistributes.
How to Make Tuna Mayo Onigiri
Ingredients
Instructions
- Rinse the rice under cold water until the water runs mostly clear. Drain well, add to a rice cooker or pot with 2 1/4 cups water, and cook according to rice cooker instructions or by bringing to a boil, then simmering covered until tender.
- Once cooked, let the rice rest covered for 10 minutes, then fluff gently with a rice paddle. Season lightly with salt if desired and let cool until warm but not hot to the touch.
- While the rice cools, make the filling: in a small bowl combine drained tuna, Japanese mayonnaise, soy sauce, and rice vinegar (if using). Mix until creamy and adjust seasoning to taste.
- Prepare a small bowl of water and a pinch of salt. Wet your hands lightly with water, then rub a little salt onto your palms to prevent sticking and lightly season the rice exterior.
- Scoop about 1/2 cup of warm rice into your hand, flatten it gently, and place about 1–2 teaspoons of tuna mayo filling in the center. Fold the rice around the filling and gently shape into a triangle or ball, making sure the filling is enclosed.
- Repeat with the remaining rice and filling to make 8 onigiri. Wrap the bottom or one side of each onigiri with a strip of nori just before serving so it stays crisp.
- Serve immediately at room temperature, or wrap tightly and pack in a lunch box to enjoy within a few hours.
Notes
Approximate per 1 onigiri (1 of 8): 190 calories; fat 6 g; saturated fat 1 g; carbohydrates 27 g; fiber 1 g; sugars 1 g; protein 7 g; sodium 260 mg. Values are estimates and will vary based on specific brands, exact quantities, and portion size.
Leave a Reply